How to Properly Clean Your Car
 Even if you are a professional detailer and can do even the most difficult paint correction job in existence, chances are you still hate cleaning glass the most. Cleaning car glass can be such a monotonous and frustrating aspect of detailing. This is mainly due to the fact that it is a completely transparent surface, making any defect or streak extremely apparent. There is no such thing as "close enough" when it comes to glass. And getting glass to crystal clear perfection is quite a chore!
 In this article, we are going to walk you through our thorough glass cleaning process step by step and give a brief explanation of why each step is important and exactly how to do it! We have split this into two parts, Exterior glass and Interior glass.
Exterior Glass
Step 1: Move the car into the shade!
Moving your car out of direct sunlight will be the single most helpful action to avoid streaks while you are cleaning your glass!
When you see streaks on glass, what you are seeing is residue, debris, or cleaning agents that are smeared across the surface of the glass with the towel. When these substances are wet and lubricated, they wipe off easily. However, when the lubrication or glass cleaner evaporates before you can wipe them off, they leave behind streaks.
Moving your car out of direct sunlight will reduce the "evaporation rate" or how quickly liquids will evaporate on your glass surface. This will give you ample time to wipe these substances off the surface without the risk of streaks.
Step 2: Rinse glass with water and dry it!
This is simply to remove the loose debris from the glass. The water will collect any loose debris and carry it to the bottom of the glass where it can be easily wiped away and dried off. This way you don't have to worry about using more glass cleaner and extra passes to clean the loose debris off later on in the process.
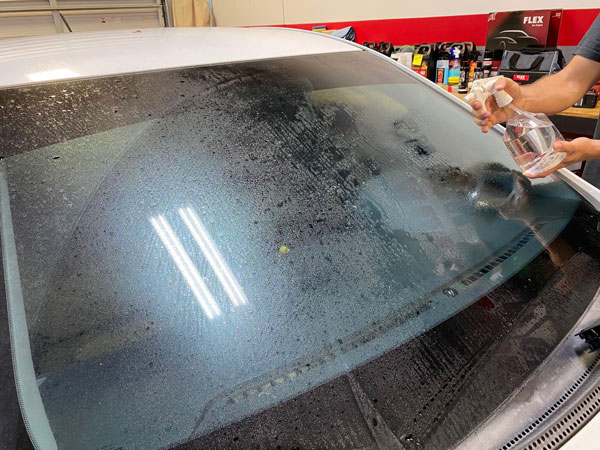
Step 3: Remove the grime and road film
Road film, grime, and various other contaminants will collect on your glass while you drive and cause a hazy film to cover the surface. The best way to remove this is by using a solution of Distilled Water, Isopropyl Alcohol, and White Vinegar. This solution will break up the film and loosen the contaminants that cause it.
Many use this as a replacement for a traditional glass cleaner, however because this provides little to no real lubrication and evaporates much more quickly due to the IPA (Isopropyl Alcohol), you will find many more streaks if you use this alone.
You will want to spray this solution liberally on the surface and immediately wipe it away. It is best to work on only one window before wiping to avoid it evaporating too quickly, split the windshield in half when doing this.
When wiping off, make sure to start with left to right motions then switch to up and down. This makes sure that you don't miss any spots when buffing it off. When working on exterior glass, always finish by wiping up and down, we will get into why later on.
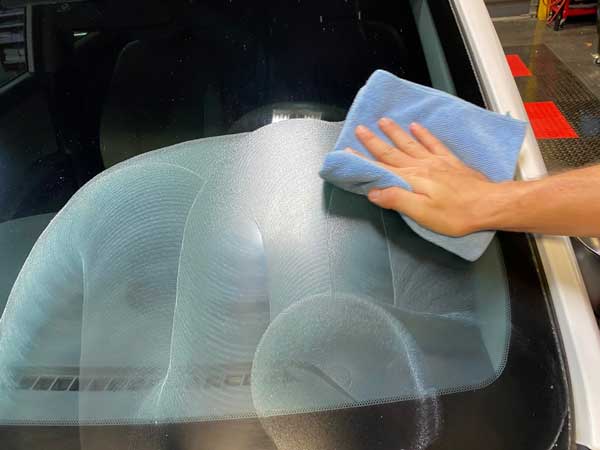
Step 4: Remove stubborn water spots and scratches
While the white vinegar in our spray solution might have helped with some of the water spots on the glass, more stubborn ones will take a more aggressive approach to correct. Also, any scratches that may be on the glass will have to be addressed.

Our BLACKFIRE Glass Water Spot Remover is a mild glass polish that will abrade the surface, removing any etching from water spots and scratching from rock chips, tree branches, etc. It can be applied by hand using a microfiber applicator, a White Polishing Applicator, or a foam applicator. If you want to work a little faster and have the available tools, you can apply it with a machine polisher like the FLEX XC 3401 Dual Action Polisher and a Lake Country Force Hybrid White Pad

Whichever method you prefer, simply apply a few drops onto the applicator and spread it first left to right, then up and down. Be sure to use overlapping passes and to work in the same sized sections as you did with the previous step.
Once you are done applying it, use a clean microfiber towel to wipe away any remaining product or residue.
Step 5: The final cleaning
Now that we have taken care of all the difficult impurities, we just need to finish the glass off to perfect clarity. This is the simplest step in the process but can sometimes be annoying if you find yourself dealing with many streaks. The risk of streaks is greatly dependent on the products you use for this step. We recommend using our BLACKFIRE Glass Cleaner and Speed Master Glass Towels
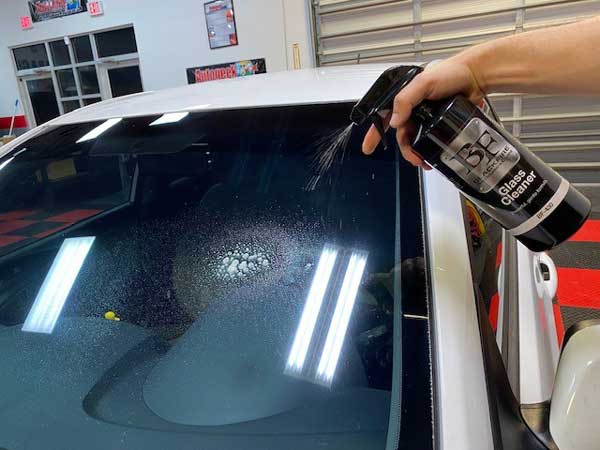
The BLACKFIRE Glass Cleaner is an ammonia free glass cleaner that will provide ample lubrication during cleaning, making streaks much less likely. It will also help to loosen any remaining light contaminants and polishing oils to leave behind a perfectly clear finish.
The Speed Master Glass Towels have a very shallow nap and tight weave. These two factors will greatly reduce the risk of streaks because there will not be any long fibers to drag the residues across the surface. The absorbent nature of microfiber will ensure that the residue and cleaners are absorbed into the towel rather than left on the surface to streak.
Spray BLACKFIRE Glass Cleaner liberally over the glass surface. Then use your Speed Master Glass Towels to wipe it away. Wipe left to right first, then go over the same section wiping up and down. You will then want to switch to a dry side of your towel or a whole new towel to buff it dry. Make sure to finish with up and down passes!
The reason you always want to finish by wiping up and down is because if there are any streaks, they will appear vertically. This means that if you finish wiping left to right when doing the interior glass, you will no which side the streak is on when you are spot check the glass.
Step 6: Spot check
While we have taken every precaution to prevent them, streaks sometimes still occur. Slowly inspect the entire glass surface from multiple different angles and search for any streaks. If you see any, grab a fresh towel, spray glass cleaner onto the glass towel, and gently buff that section until the streak is gone.
Repeat the process as necessary for a perfectly clear finish.
Now that your exterior glass is perfectly clean and clear, let's move on to the interior!
Interior Glass
Step 1: Remove loose debris
Much like when cleaning the exterior, we want to remove any loose debris. It would not be wise to rinse your interior glass unless you are planning on dealing with the resulting mildew in your carpets. So, we are simply going to gently wipe the glass with a clean microfiber towel. Microfiber naturally attracts dust and dirt, so you will be able to remove a decent amount of the minimal debris that is on your interior glass.
Step 2: Remove the grime
While this is not as big of an issue as it is with your exterior glass, there are still a number of things that collect on the interior of your glass and create a film. Smoking is the main cause of interior glass haze, it most commonly referred to as "smoker's film". This is caused by the carcinogens and smoke in cigarettes collecting on your interior glass, creating a film. It is usually quite difficult to remove as it is extremely oily. However, even if you don't smoke, there will still be interior glass haze.
We are going to use the same solution we used on our exterior glass to break up the film and wipe it away. For those of you with tinted windows, don't worry, none of these ingredients will damage the tint on your glass.
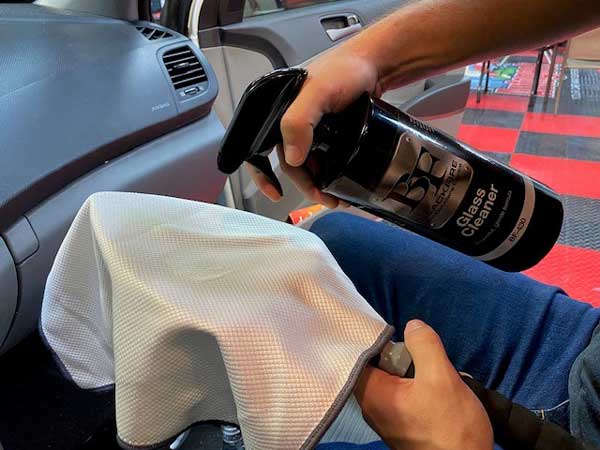
The only difference is we are going to spray the solution directly onto the Speed Master Glass Towels as opposed to the glass. This way we don't have to worry about any overspray. When working on the windshield, we recommend sitting in the passenger seat, so you don't have to reach over the steering wheel. Also, using the Glass Master Pro Glass and Surface Cleaner will allow you to more easily reach the lower corners of the glass without sacrificing cleaning abilities!

When wiping on and off on interior glass, we want to start with up and down passes and finish with left to right passes. Make sure to dry the surface completely before moving on.
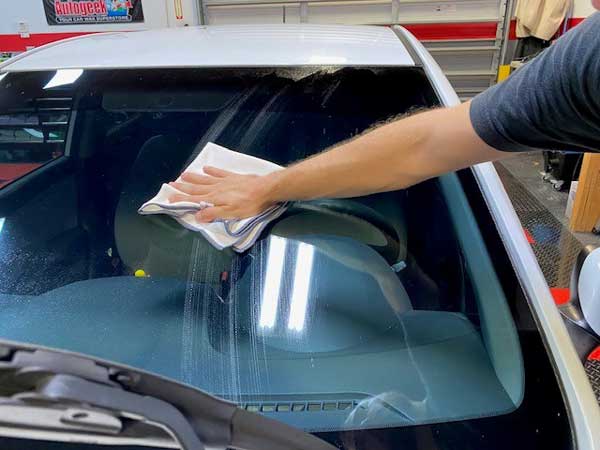
Step 3: The final cleaning
Just like on our exterior glass, we want to finish the glass off to a perfectly clean finish. To do so we are again going to use our BLACKFIRE Glass Cleaner and Speed Master Glass Towels. Our BLACKFIRE Glass cleaner is ammonia-free, so it will not harm any tint you have on your interior windows.
Once again, we are going to spray the cleaner directly onto the towel as opposed to the glass to avoid overspray. We will then work going first up and down, then left to right. Switch to a new side of the towel or a new towel entirely, if necessary, to properly dry the surface to a streak-free clarity. Make sure to finish with left and right passes!
When you are cleaning your side windows, make sure to roll the window down halfway when cleaning the top of it to make sure you can get as much of the glass surface clean as you possibly can!
Step 4: Spot check
Once again, spot check your entire glass surface from many different angles to spot any streaking that may occur. If you find any, grab a new towel, spray a reduced amount of BLACKFIRE Glass Cleaner onto the towel, and spot buff until it is perfectly clear.
Now that your glass is crystal clear, keeping it clean is the goal! We recommend protecting your glass with a ceramic coating like our BLACKFIRE Pro Ceramic Paint Coating Black Edition to prevent the risk of water spots and road film.
Enjoy your clear view of the road!

Regular Price:$67.95Our Price:$49.99