How to Get Rid of Scratches and Swirls
Scratches, swirls, and paint defects in general are simply an unfortunate by-product of owning a car. You can try your best to reduce the risk and severity of them, but ultimately, they are going to happen whether you like it or not. However, that does not mean that they are permanent!
The process of removing them is a bit involved, but by no means impossible! The concept of paint correction in and of itself is easy to understand, so we will start there.
The main goal of paint correction is to create a surface that is as smooth as possible. This is because When your paint is scratched, all that happens is that some of the clear coat is removed and an empty crevice is left in its place. Now that there is a crevice in your paint, it is no longer perfectly smooth.
Now, to FILL IN the scratch, you have two options, neither of which are very good ones. A. Use a product that has temporary fillers to hide the scratch for a few days before the fillers wash out and you�re back to marred paint. B. Spend potentially thousands of dollars getting your car re-painted and re-clear coated
Because those options are either expensive or ineffective, most people don�t attempt to fill the scratch in. Instead, they abrade the surface AROUND the scratch until it is level, making a perfectly smooth surface once more! And with a smooth surface, comes greater gloss, depth, and clarity of your paint!
For those of you wondering just how you can go about correcting your paint to achieve the perfect finish, we have outlined every step we use when we detail cars so you can see just how achievable it is!
Step 1: The Inspection
The first thing we are going to do is see just how severe the damage is that we are trying to correct. This way we will be able to estimate what sort of products and method we are going to need to achieve the results we want.
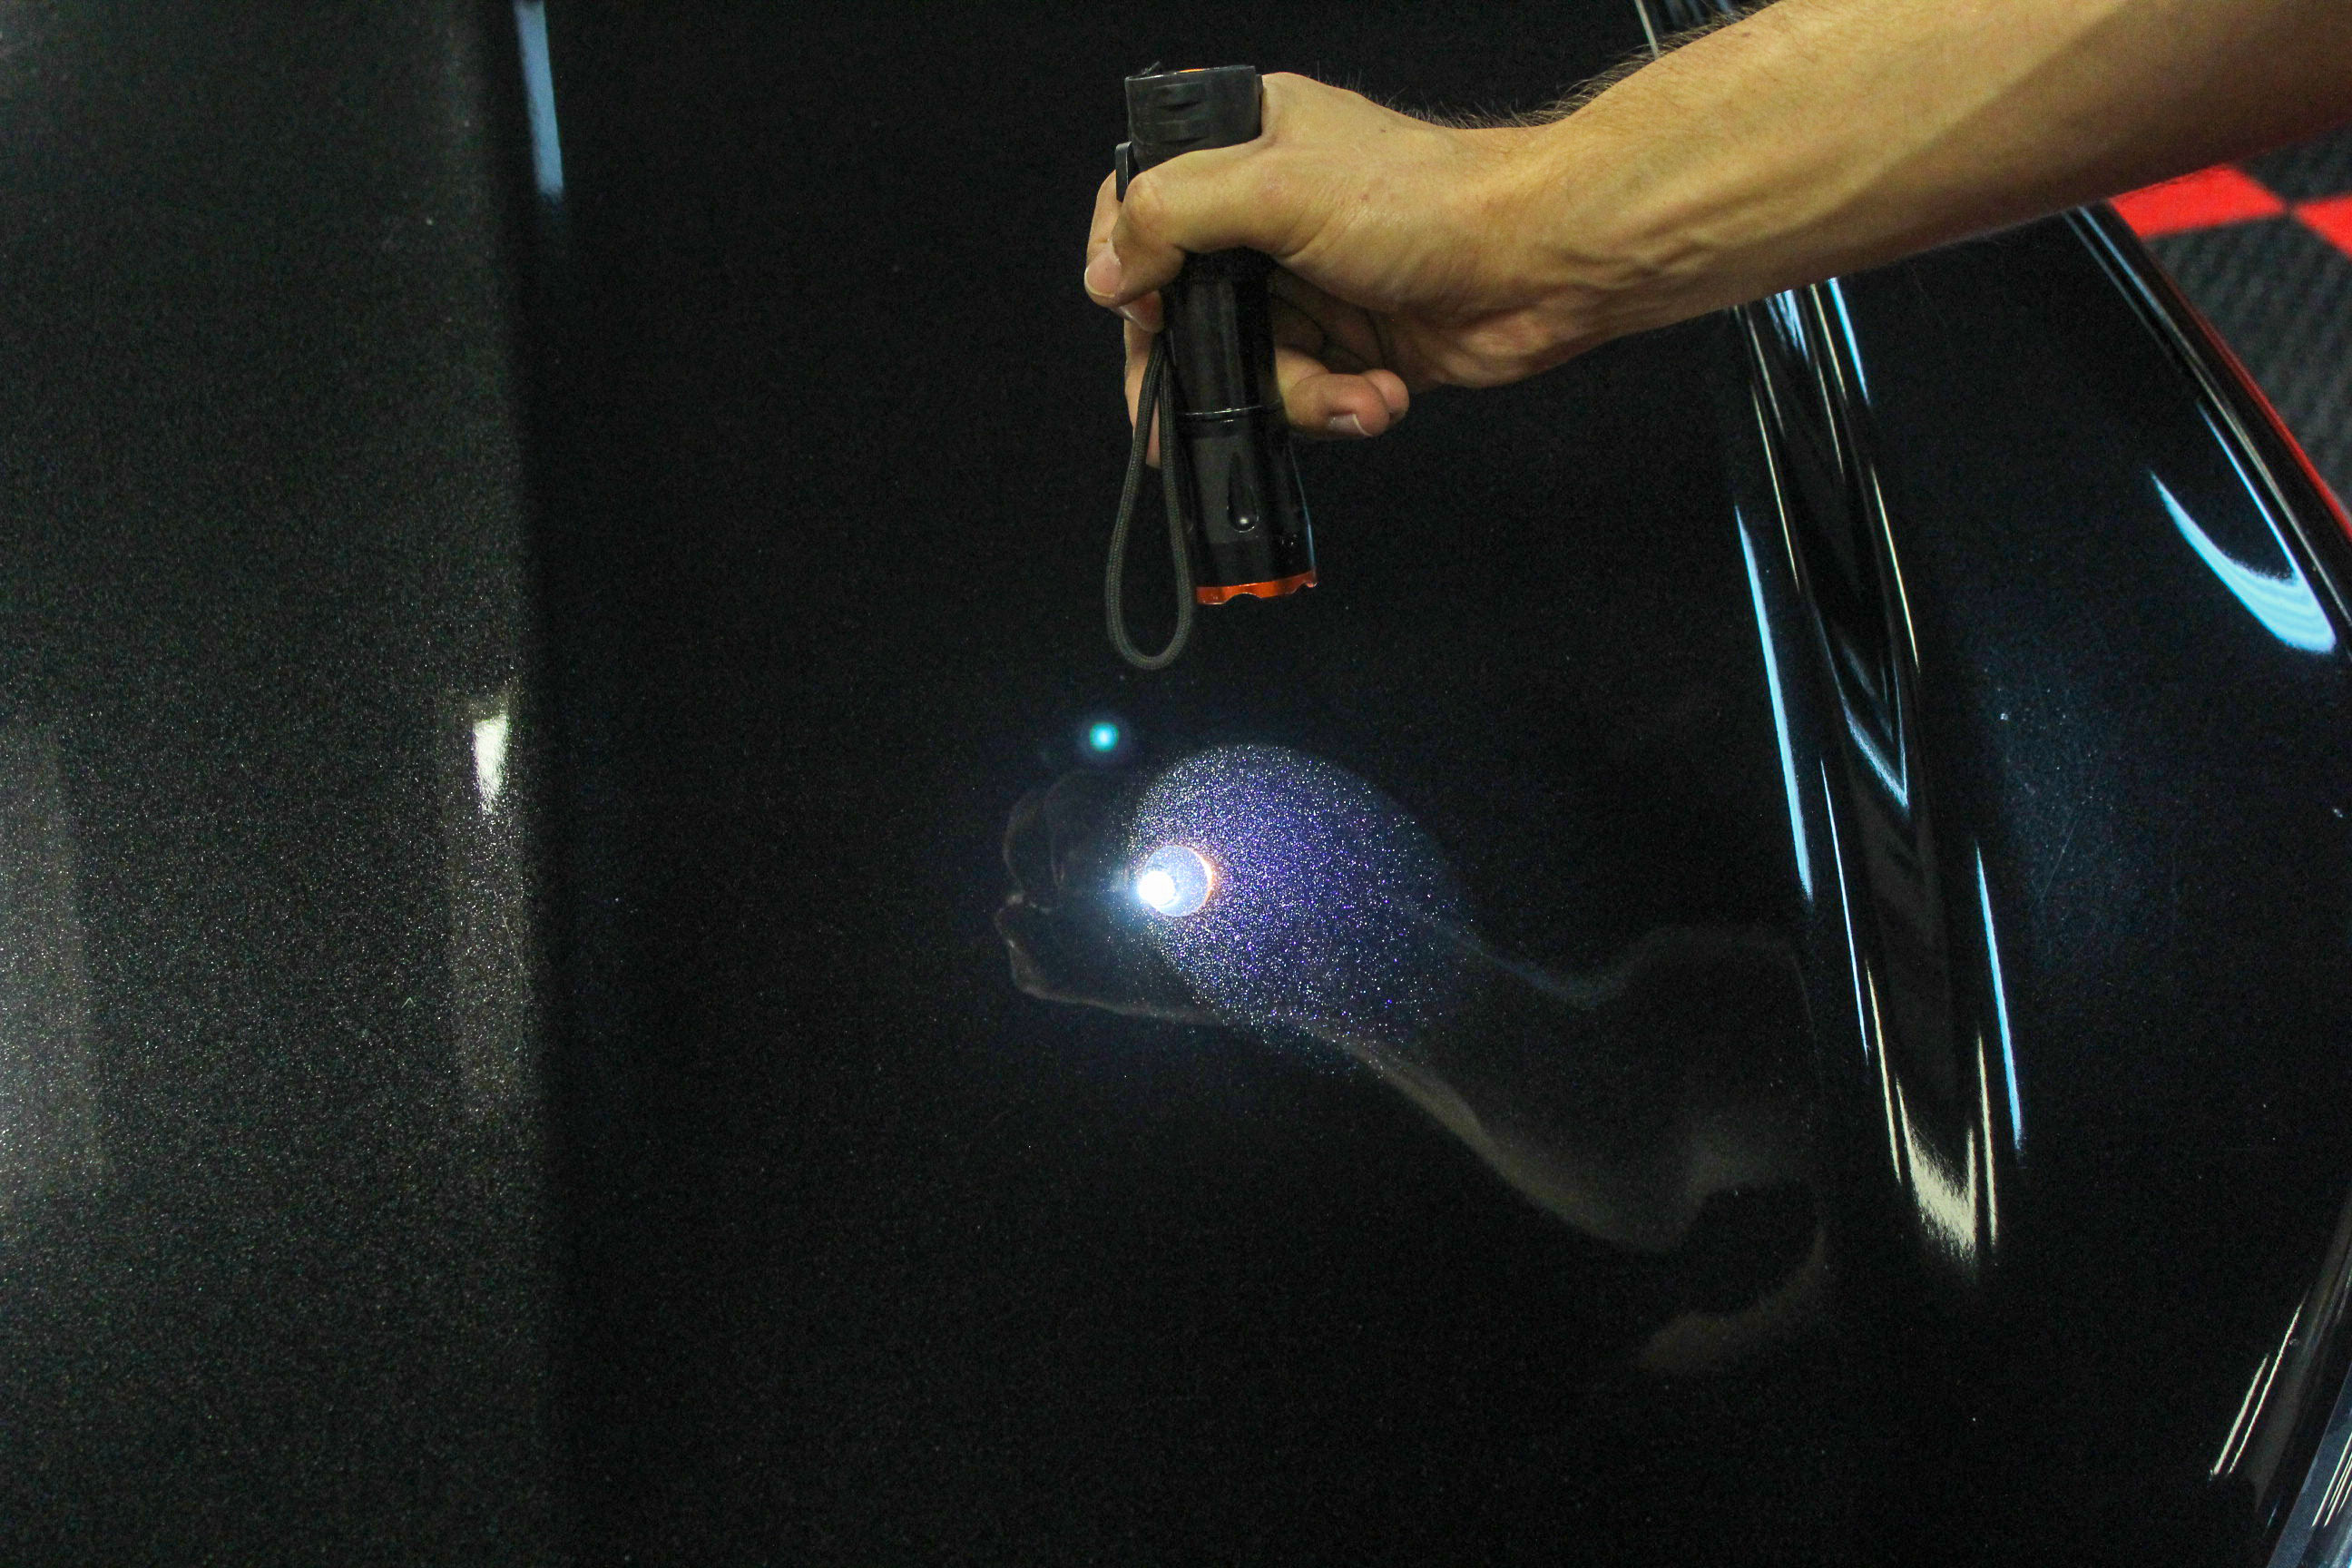
To do this, we are going to use a standard LED flashlight. By shining the flashlight on the paint and looking at the perimeter of the on the light, we will be able to get a good view of the severity of the scratches, swirls, and defects in the paint.
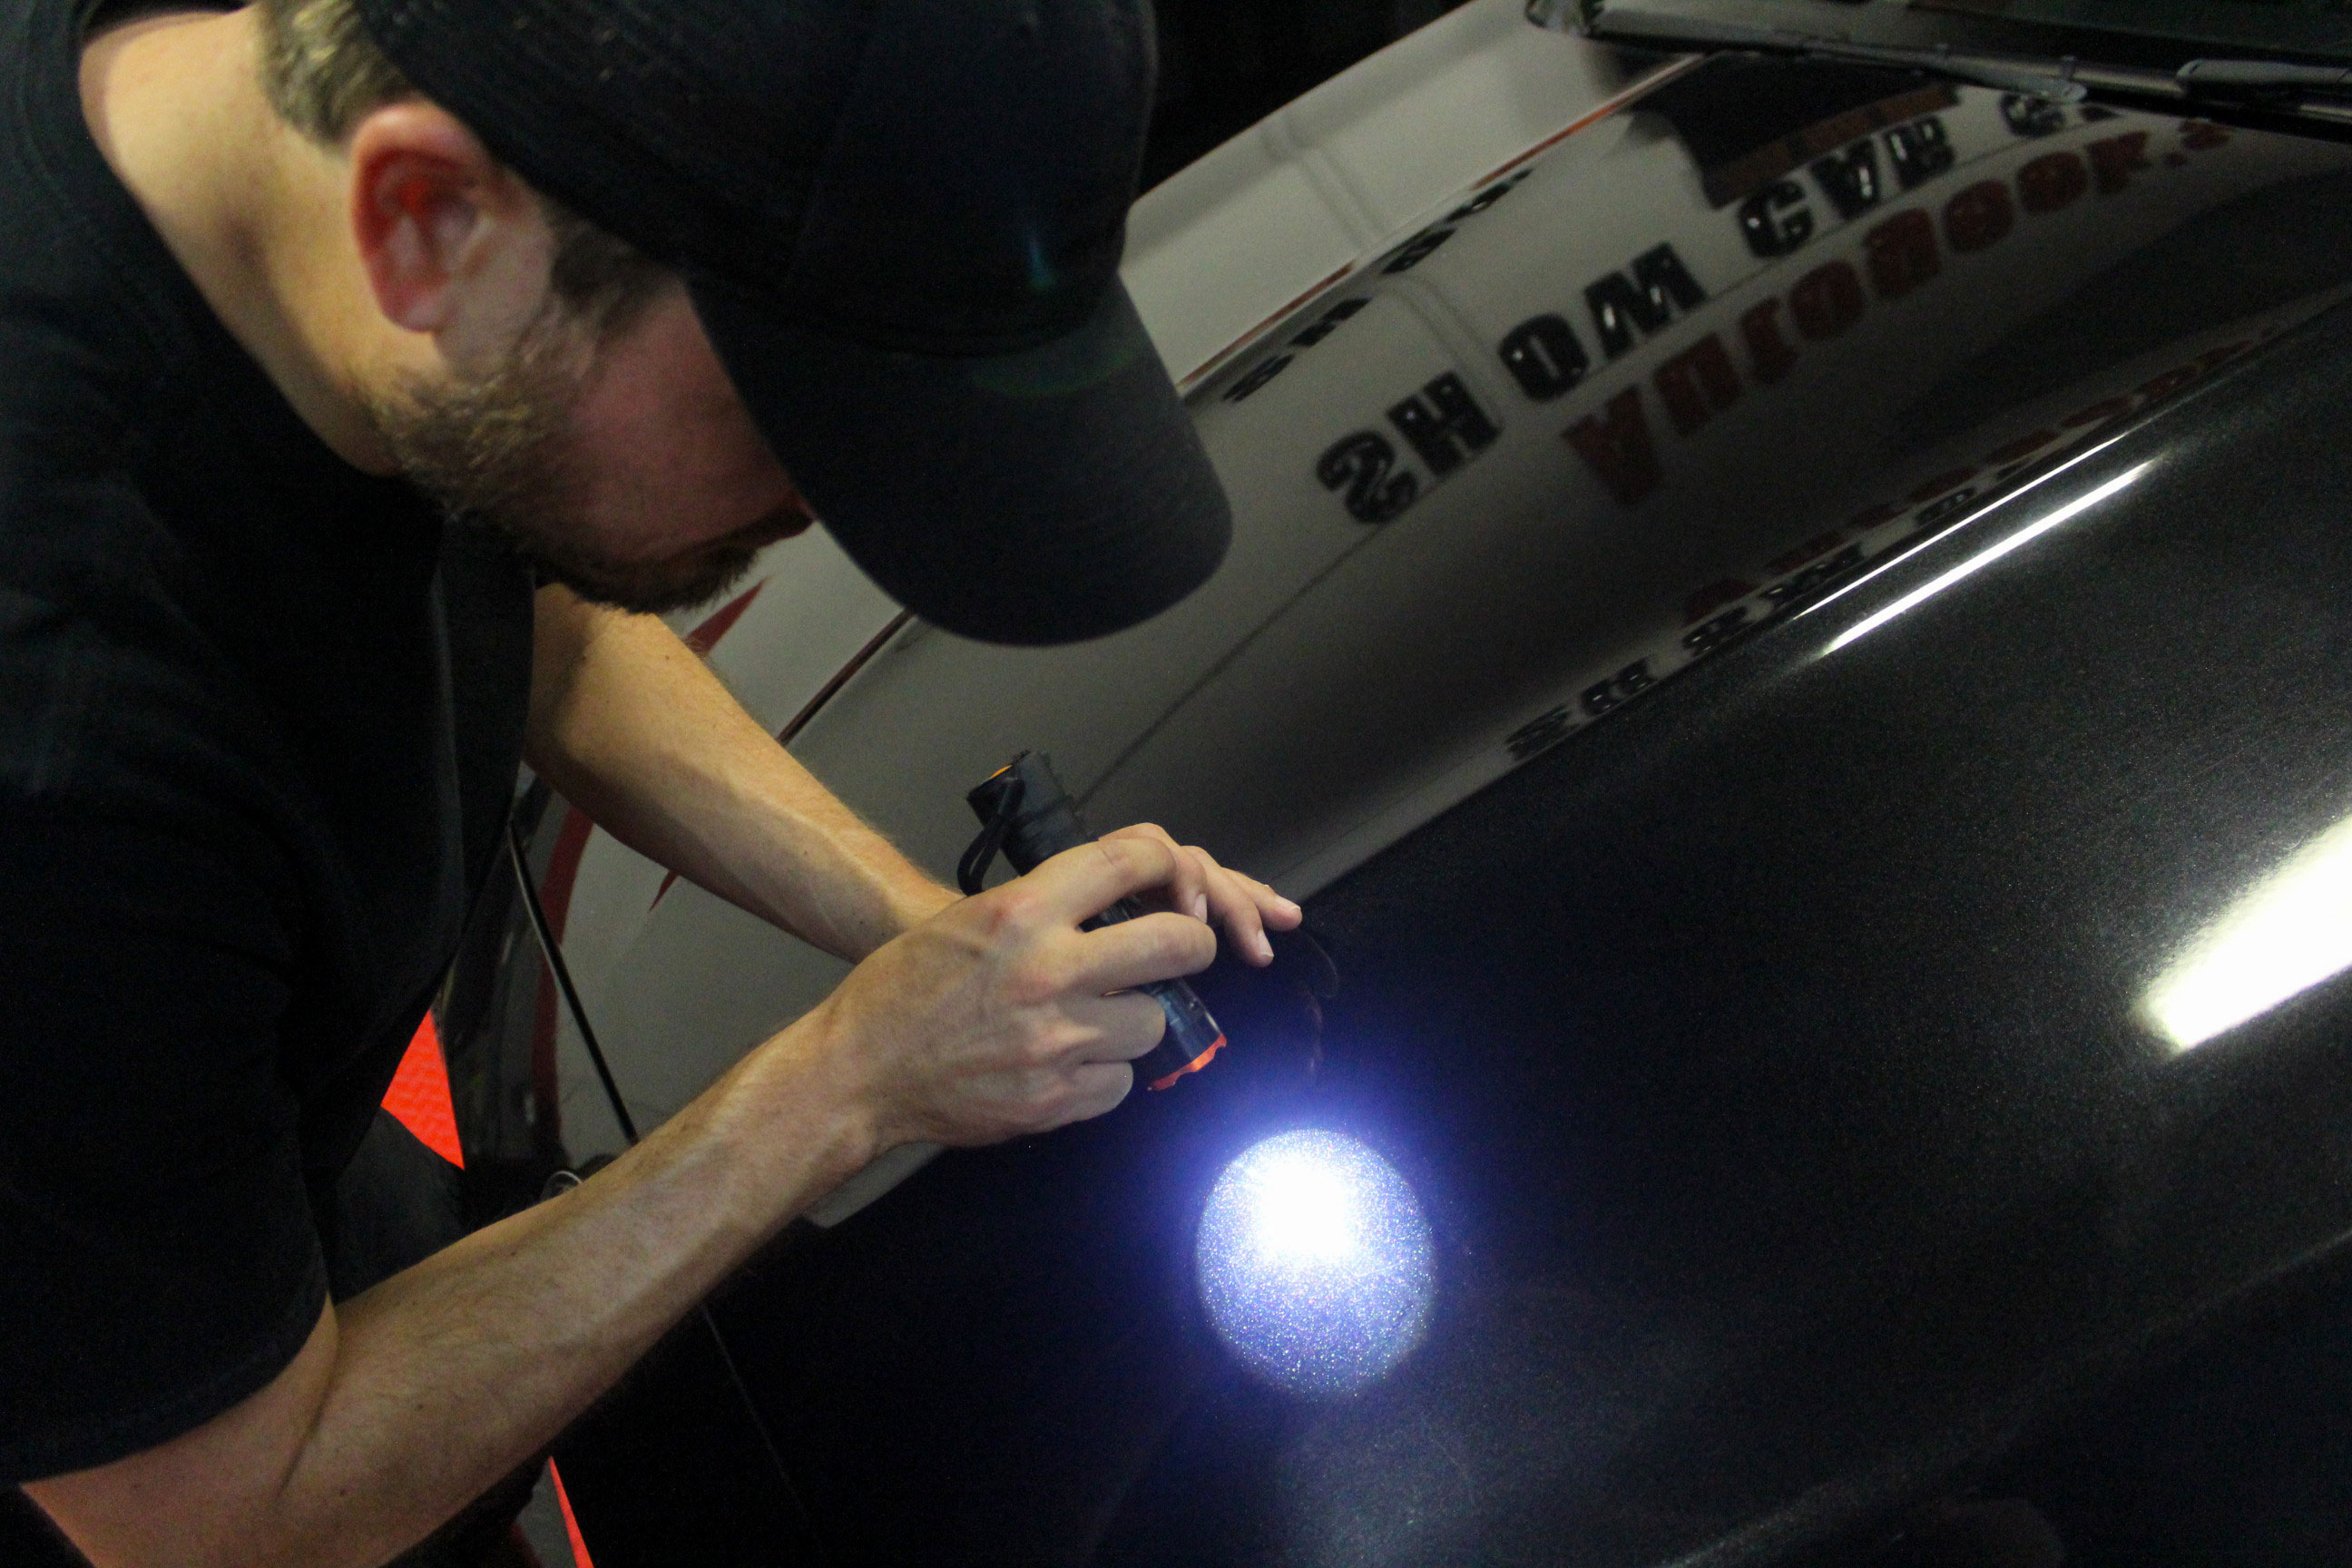
Unfortunately, the metallic flakes in the paint reflect too much of the light back to the camera to be able to get a good picture of the swirls and scratches that are already in the paint. However, if you use this method for yourself, you will be able to see a great many more defects than if you were to just look with your naked eye.
There are stronger lights that you could use to do an even more thorough inspection. The stronger the light, the more defects will be illuminated. This is especially helpful for vehicles that have lighter paint colors. However, because we are working with black paint, this small flashlight will be able to reveal the vast majority of the defects due to the contrast between the light and the dark color paint.
While we were inspecting the paint, we noticed that there were quite a few irreparable defects in the paint. There were many rock chips, scratches, bird-dropping etchings, and other defects that had penetrated through the clear coat itself. Meaning it would take more than just a polisher and some compound to get rid of.
But, for the things we could fix, we theorized we would need to use a compound and a medium aggressive cutting pad. That being said, theory and fact are two very different things! So, we need to make sure we are correct first.
Step 2: The Test Section
This is by far the most important part of the paint correction process. By doing a test section, you are saving money, time, and most importantly, clear coat.
Car paints are very similar to fingerprints in that no two paint jobs are exactly the same. There can be similarities between two cars if they are made by the same manufacture in the same year, but they are never EXACTLY the same. Some paints are soft, some hard, some thick, some thin.
Because each paint job is unique, we need to make sure that we figure out how this particular paint is going to respond to our paint correction process before we commit to working on the entire car. This is why we are doing a test section!
We will choose a small section of paint that has the highest concentration of the most severe defects and work out which paint correction method is going to get that one spot to perfection.
Now, because we are talking about literally grinding down the clear coat (to put it bluntly) we don�t want to take off any more than is absolutely necessary. For this reason, we will start with our LEAST aggressive approach, see how well it takes out defects, then move up in aggressiveness if necessary. Once we have figured out the least aggressive product that will give us the correction results we want, we will then work out way back down in aggressiveness to take out any marring caused in the process.
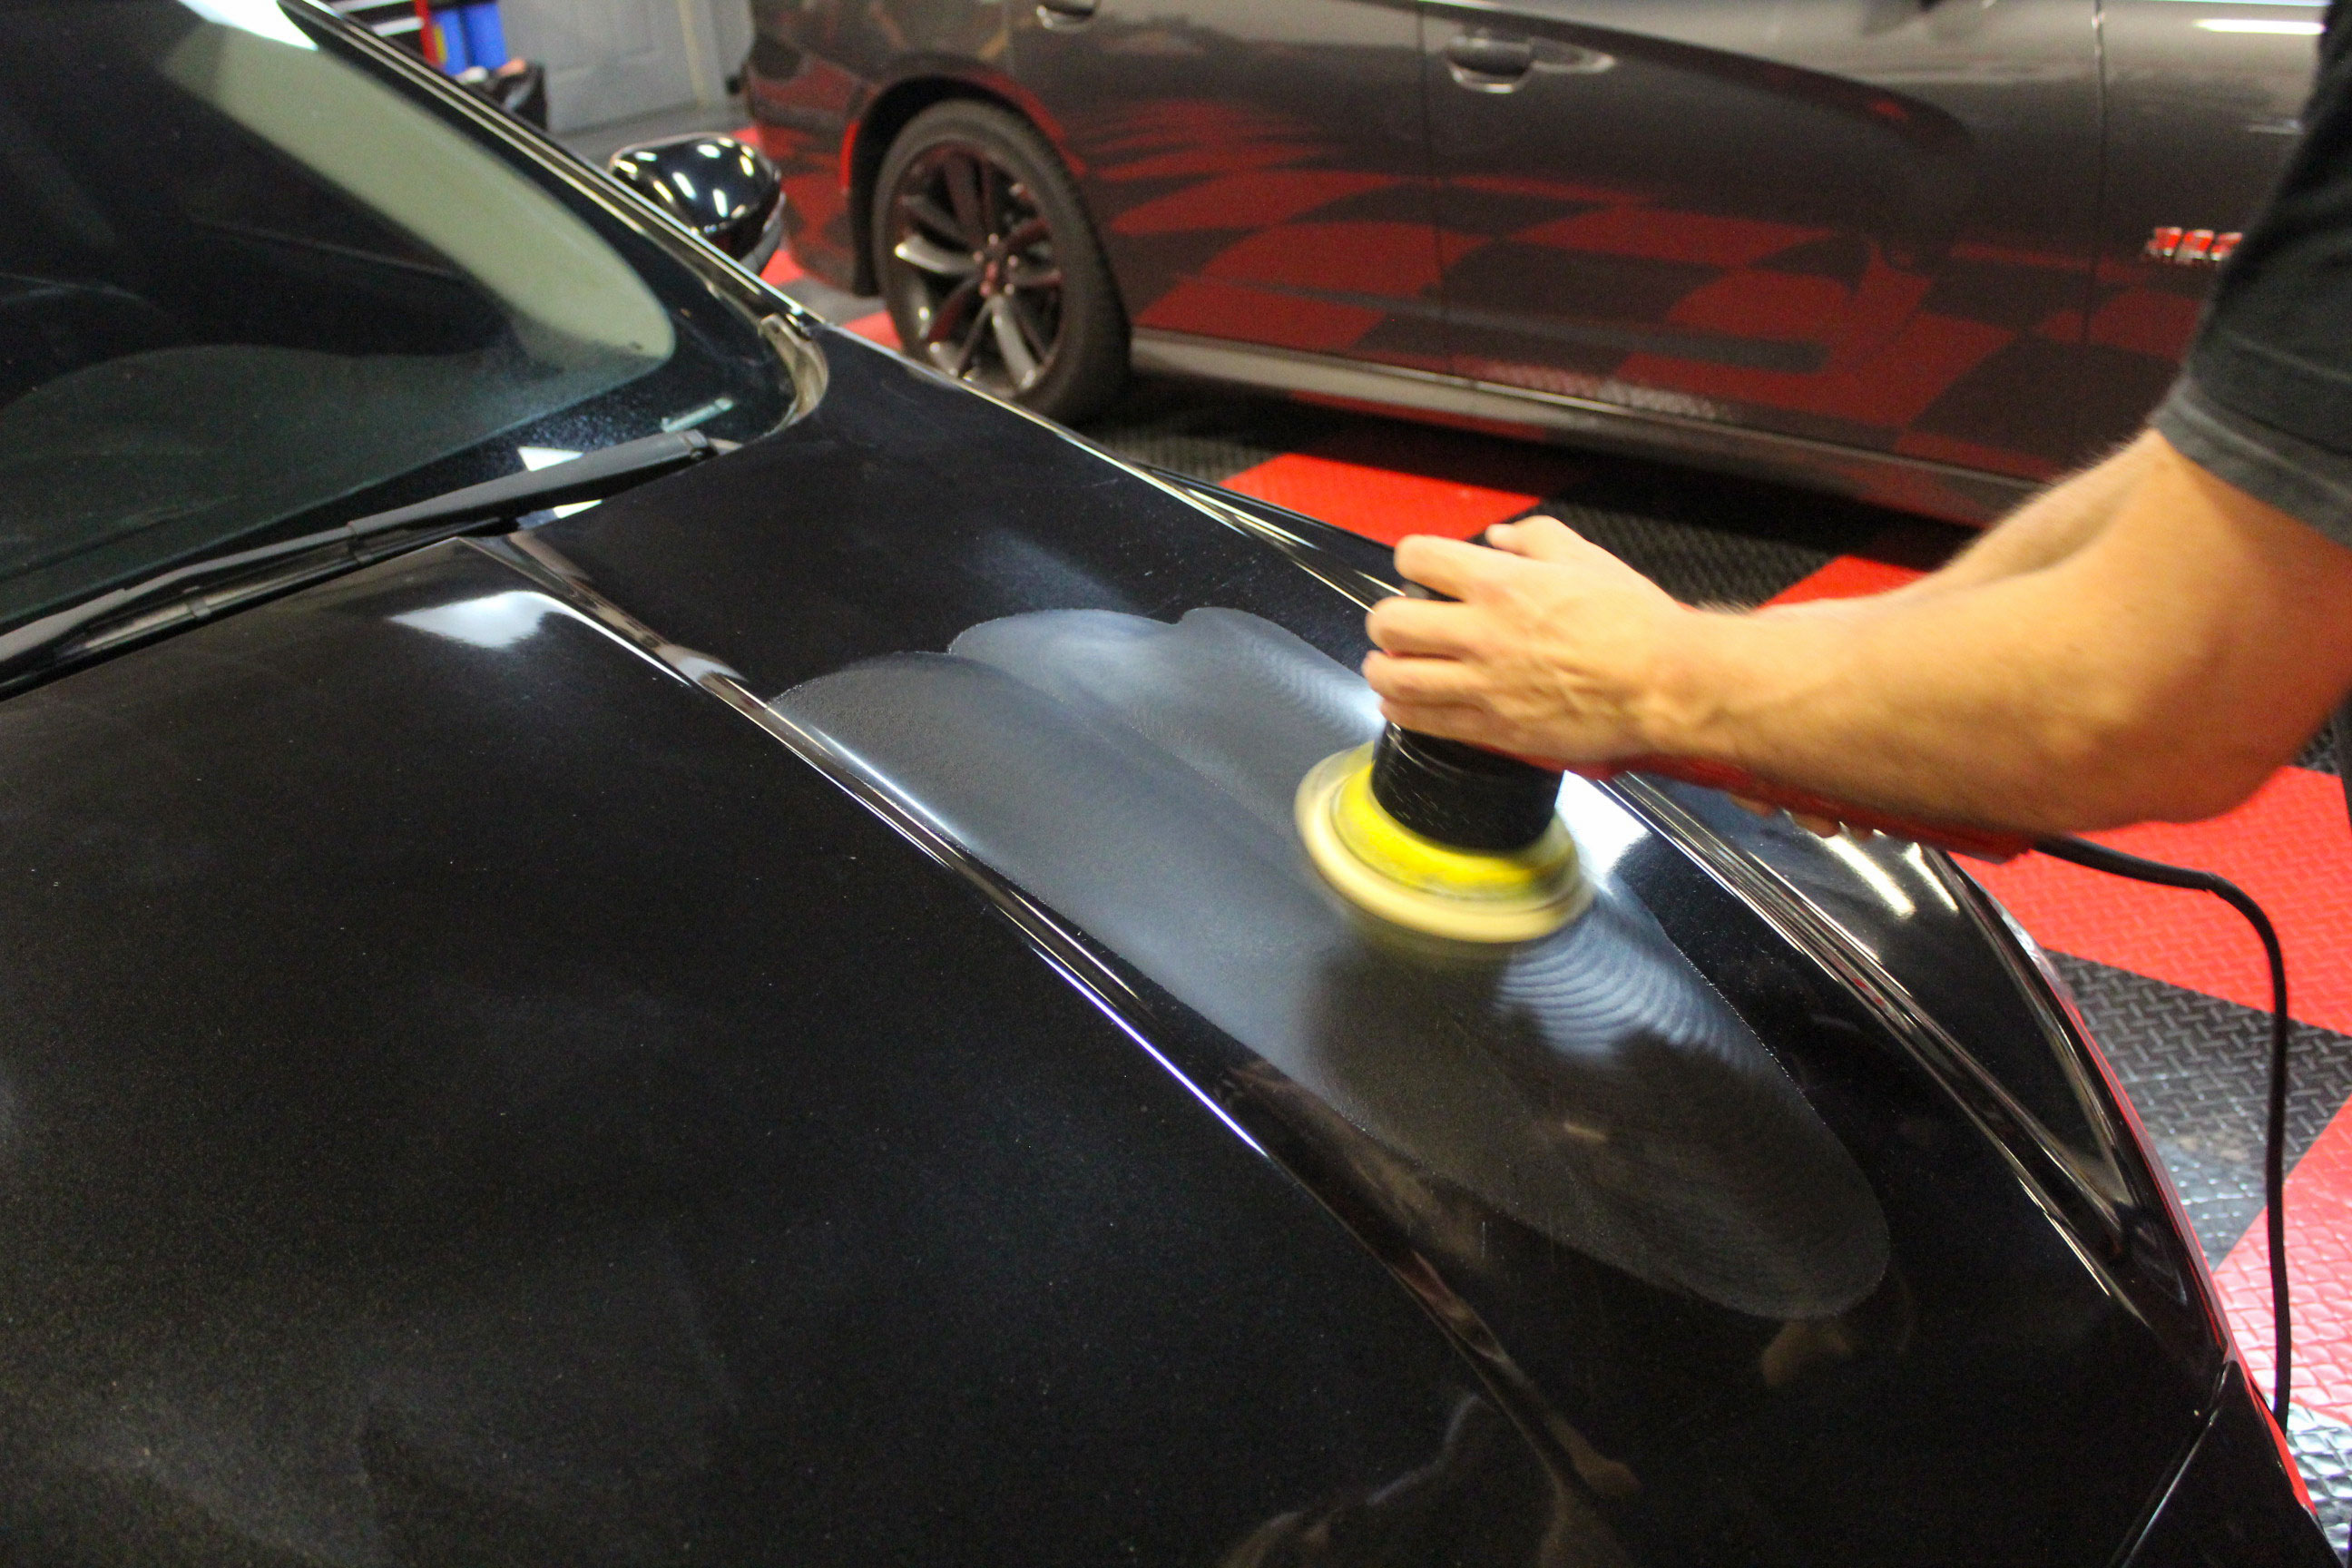
Our polisher of choice for this process is the Griot�s Garage 6-inch polisher. As far as free-spinning dual-action polishers goes, it packs a fair amount of correcting power. It should be able to do everything we need it to do for this job, but we do have out trusty FLEX 3401 on standby if we need a bit more punch.
The hood/grille of the vehicle is the part of the car that tends to take the brunt of the damage due to it being the area that the contamination gets to first. As such, it seems like the most likely place to do our test. Because if we can hone our process there, we will definitely be able to use that process on the rest of the car too.
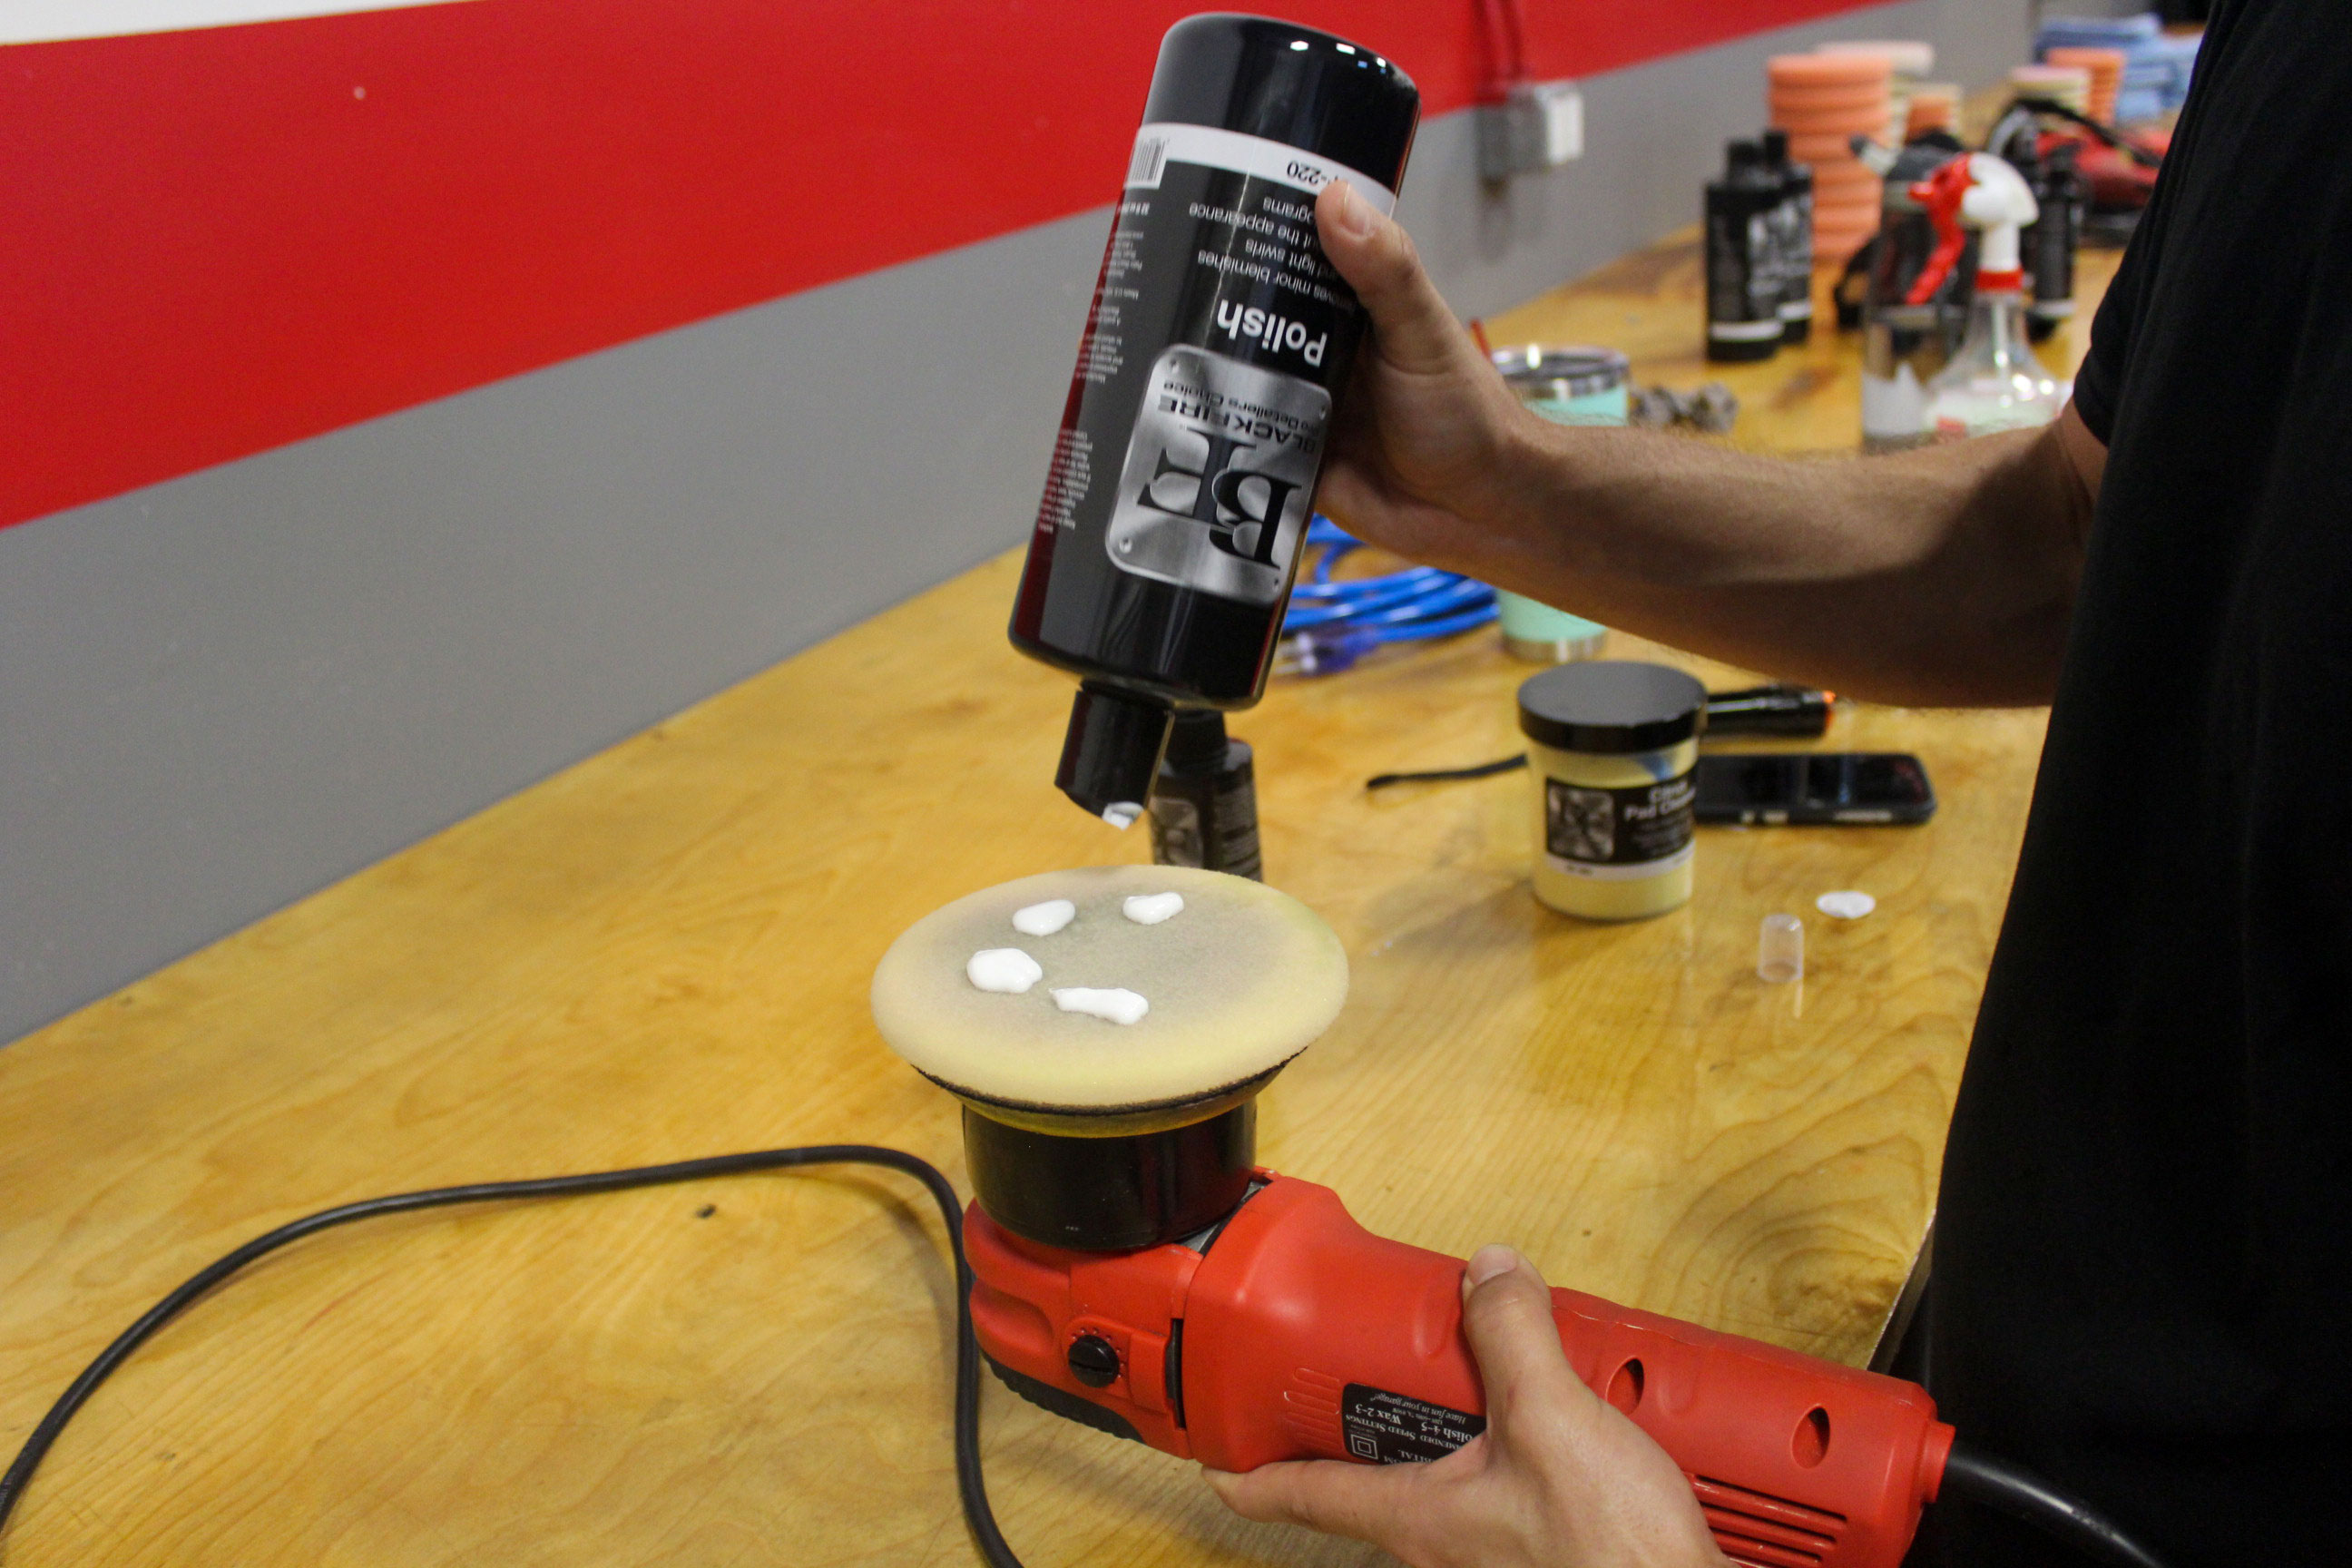
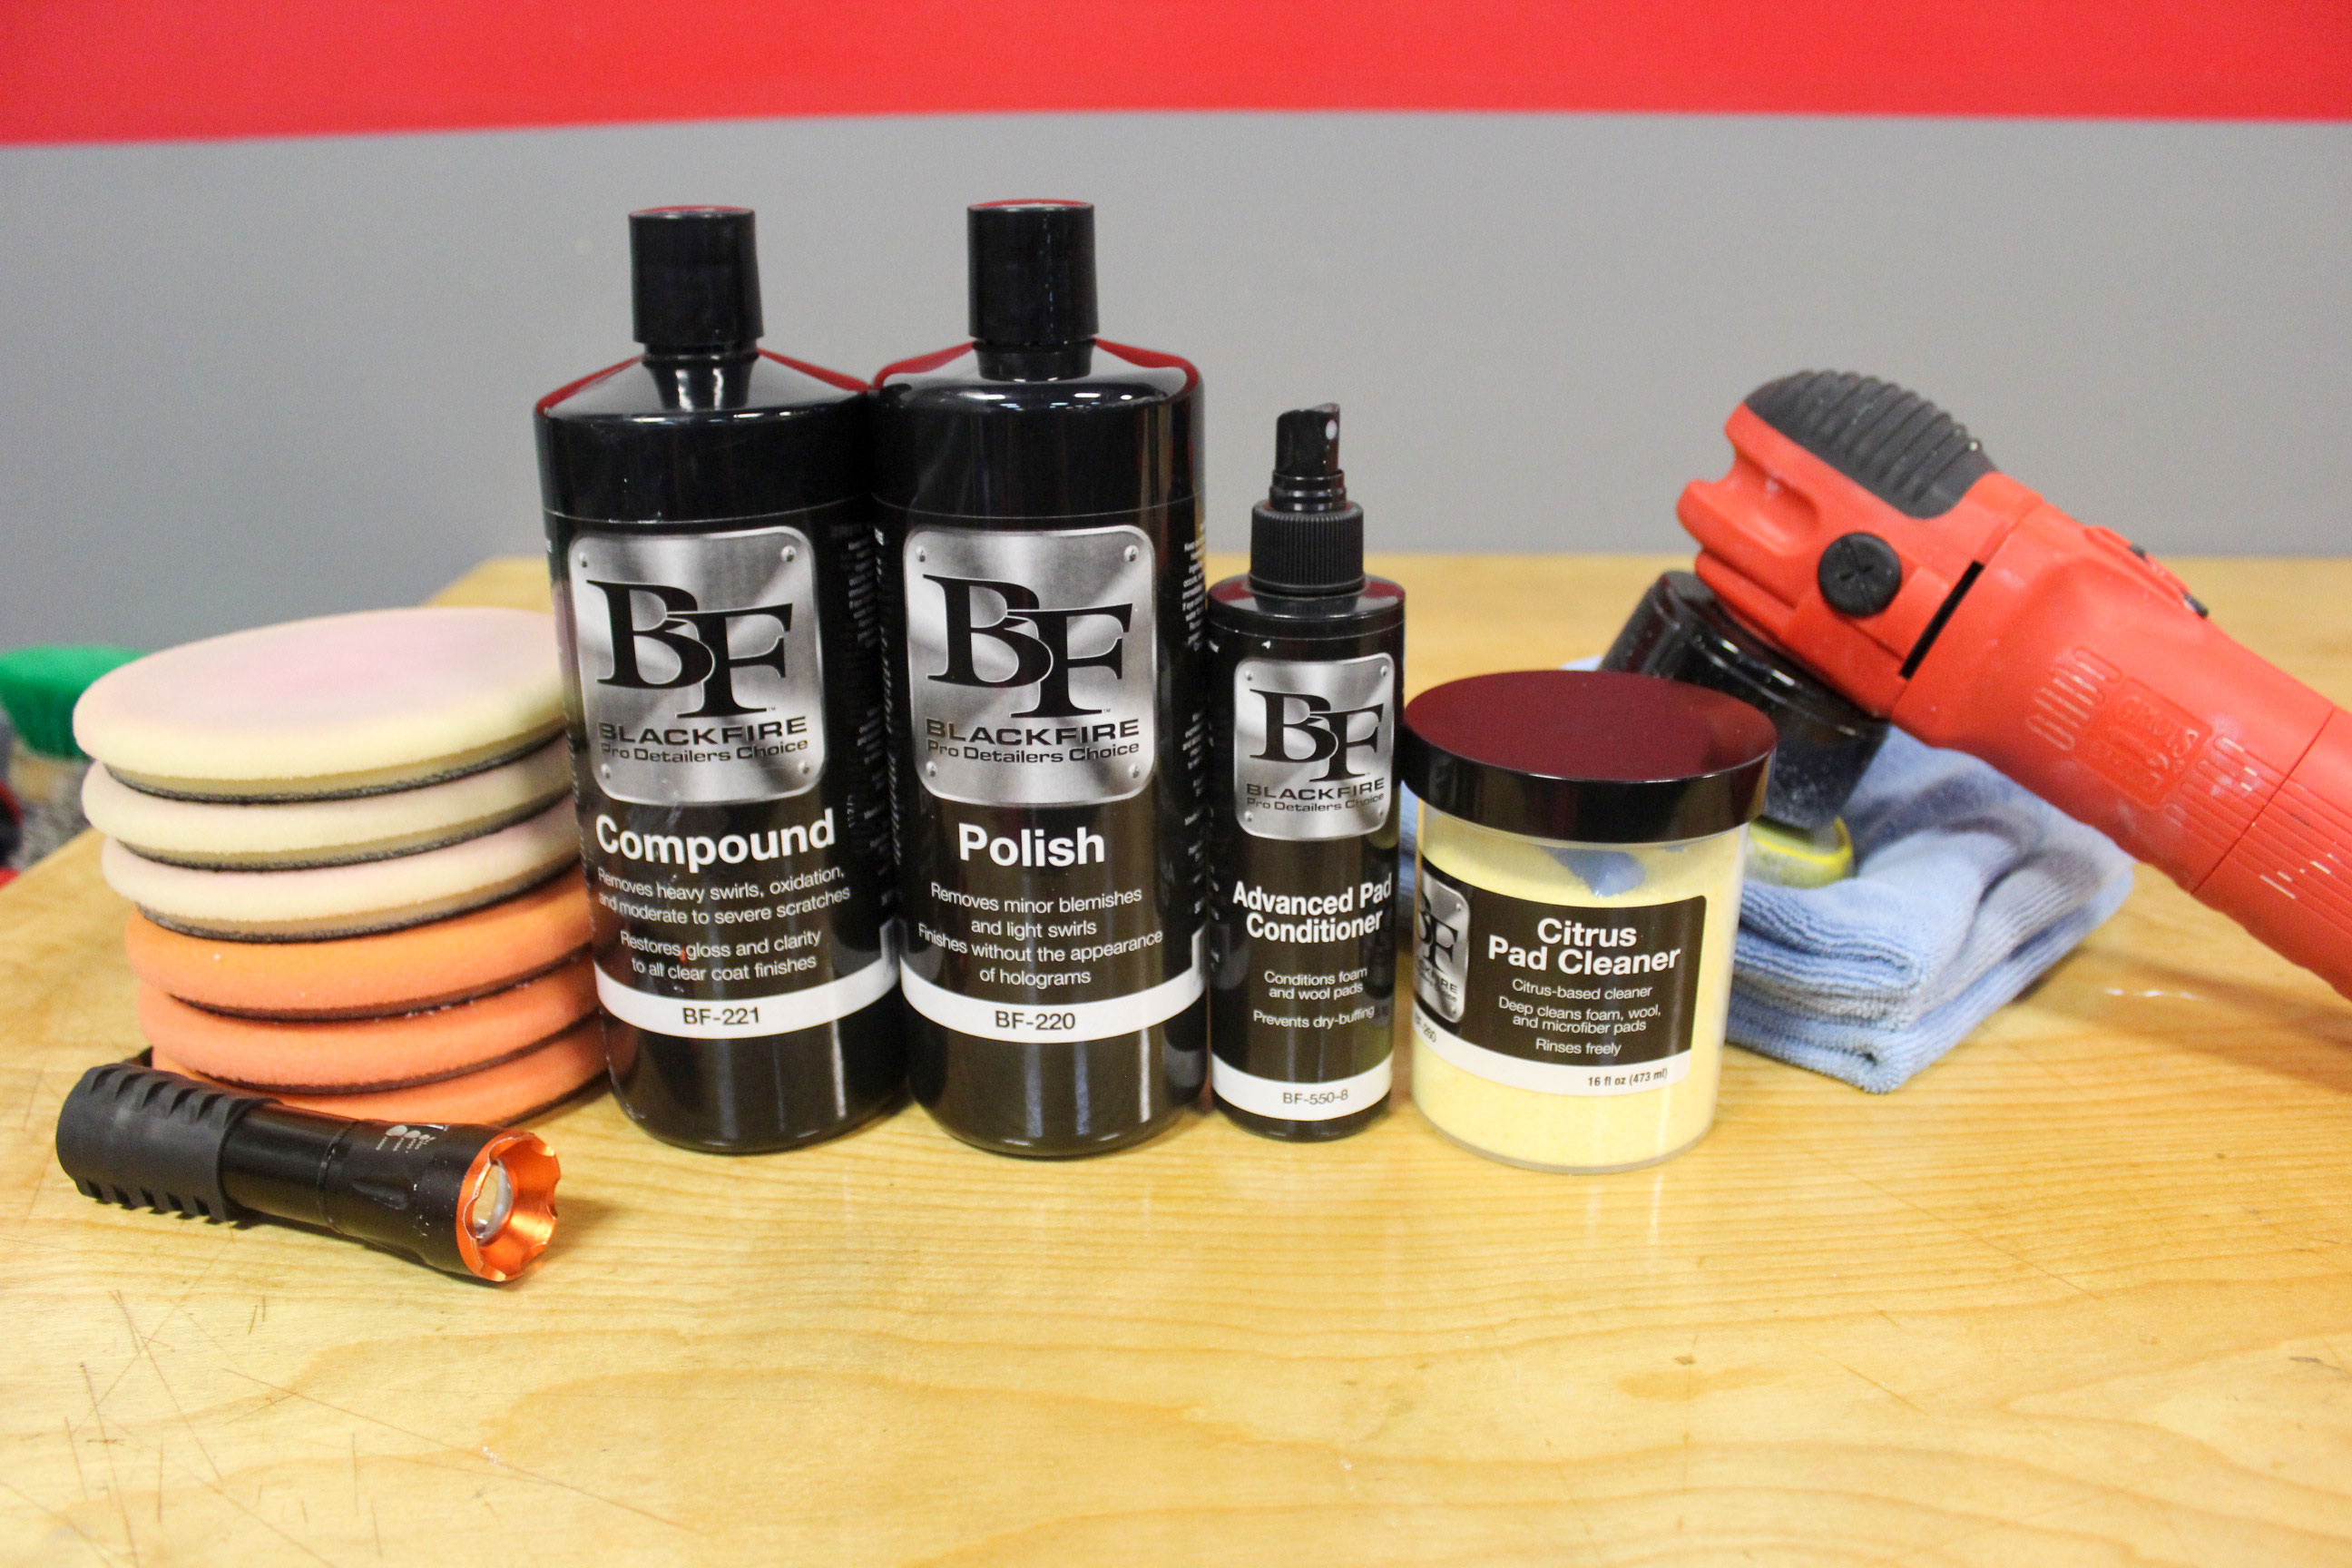
We will start off by using our BLACKFIRE Polish and a Lake Country ThinPro White Polishing Pad to see what sort of result we get.
To make sure that we are reducing the risk of �dry buffing� as much as possible, we will be sure to prime the pad and make sure that it is well lubricated. We are going to use a two step priming method for extra safety. First, we will spray the pad down with our BLACKFIRE Pad Conditioner.
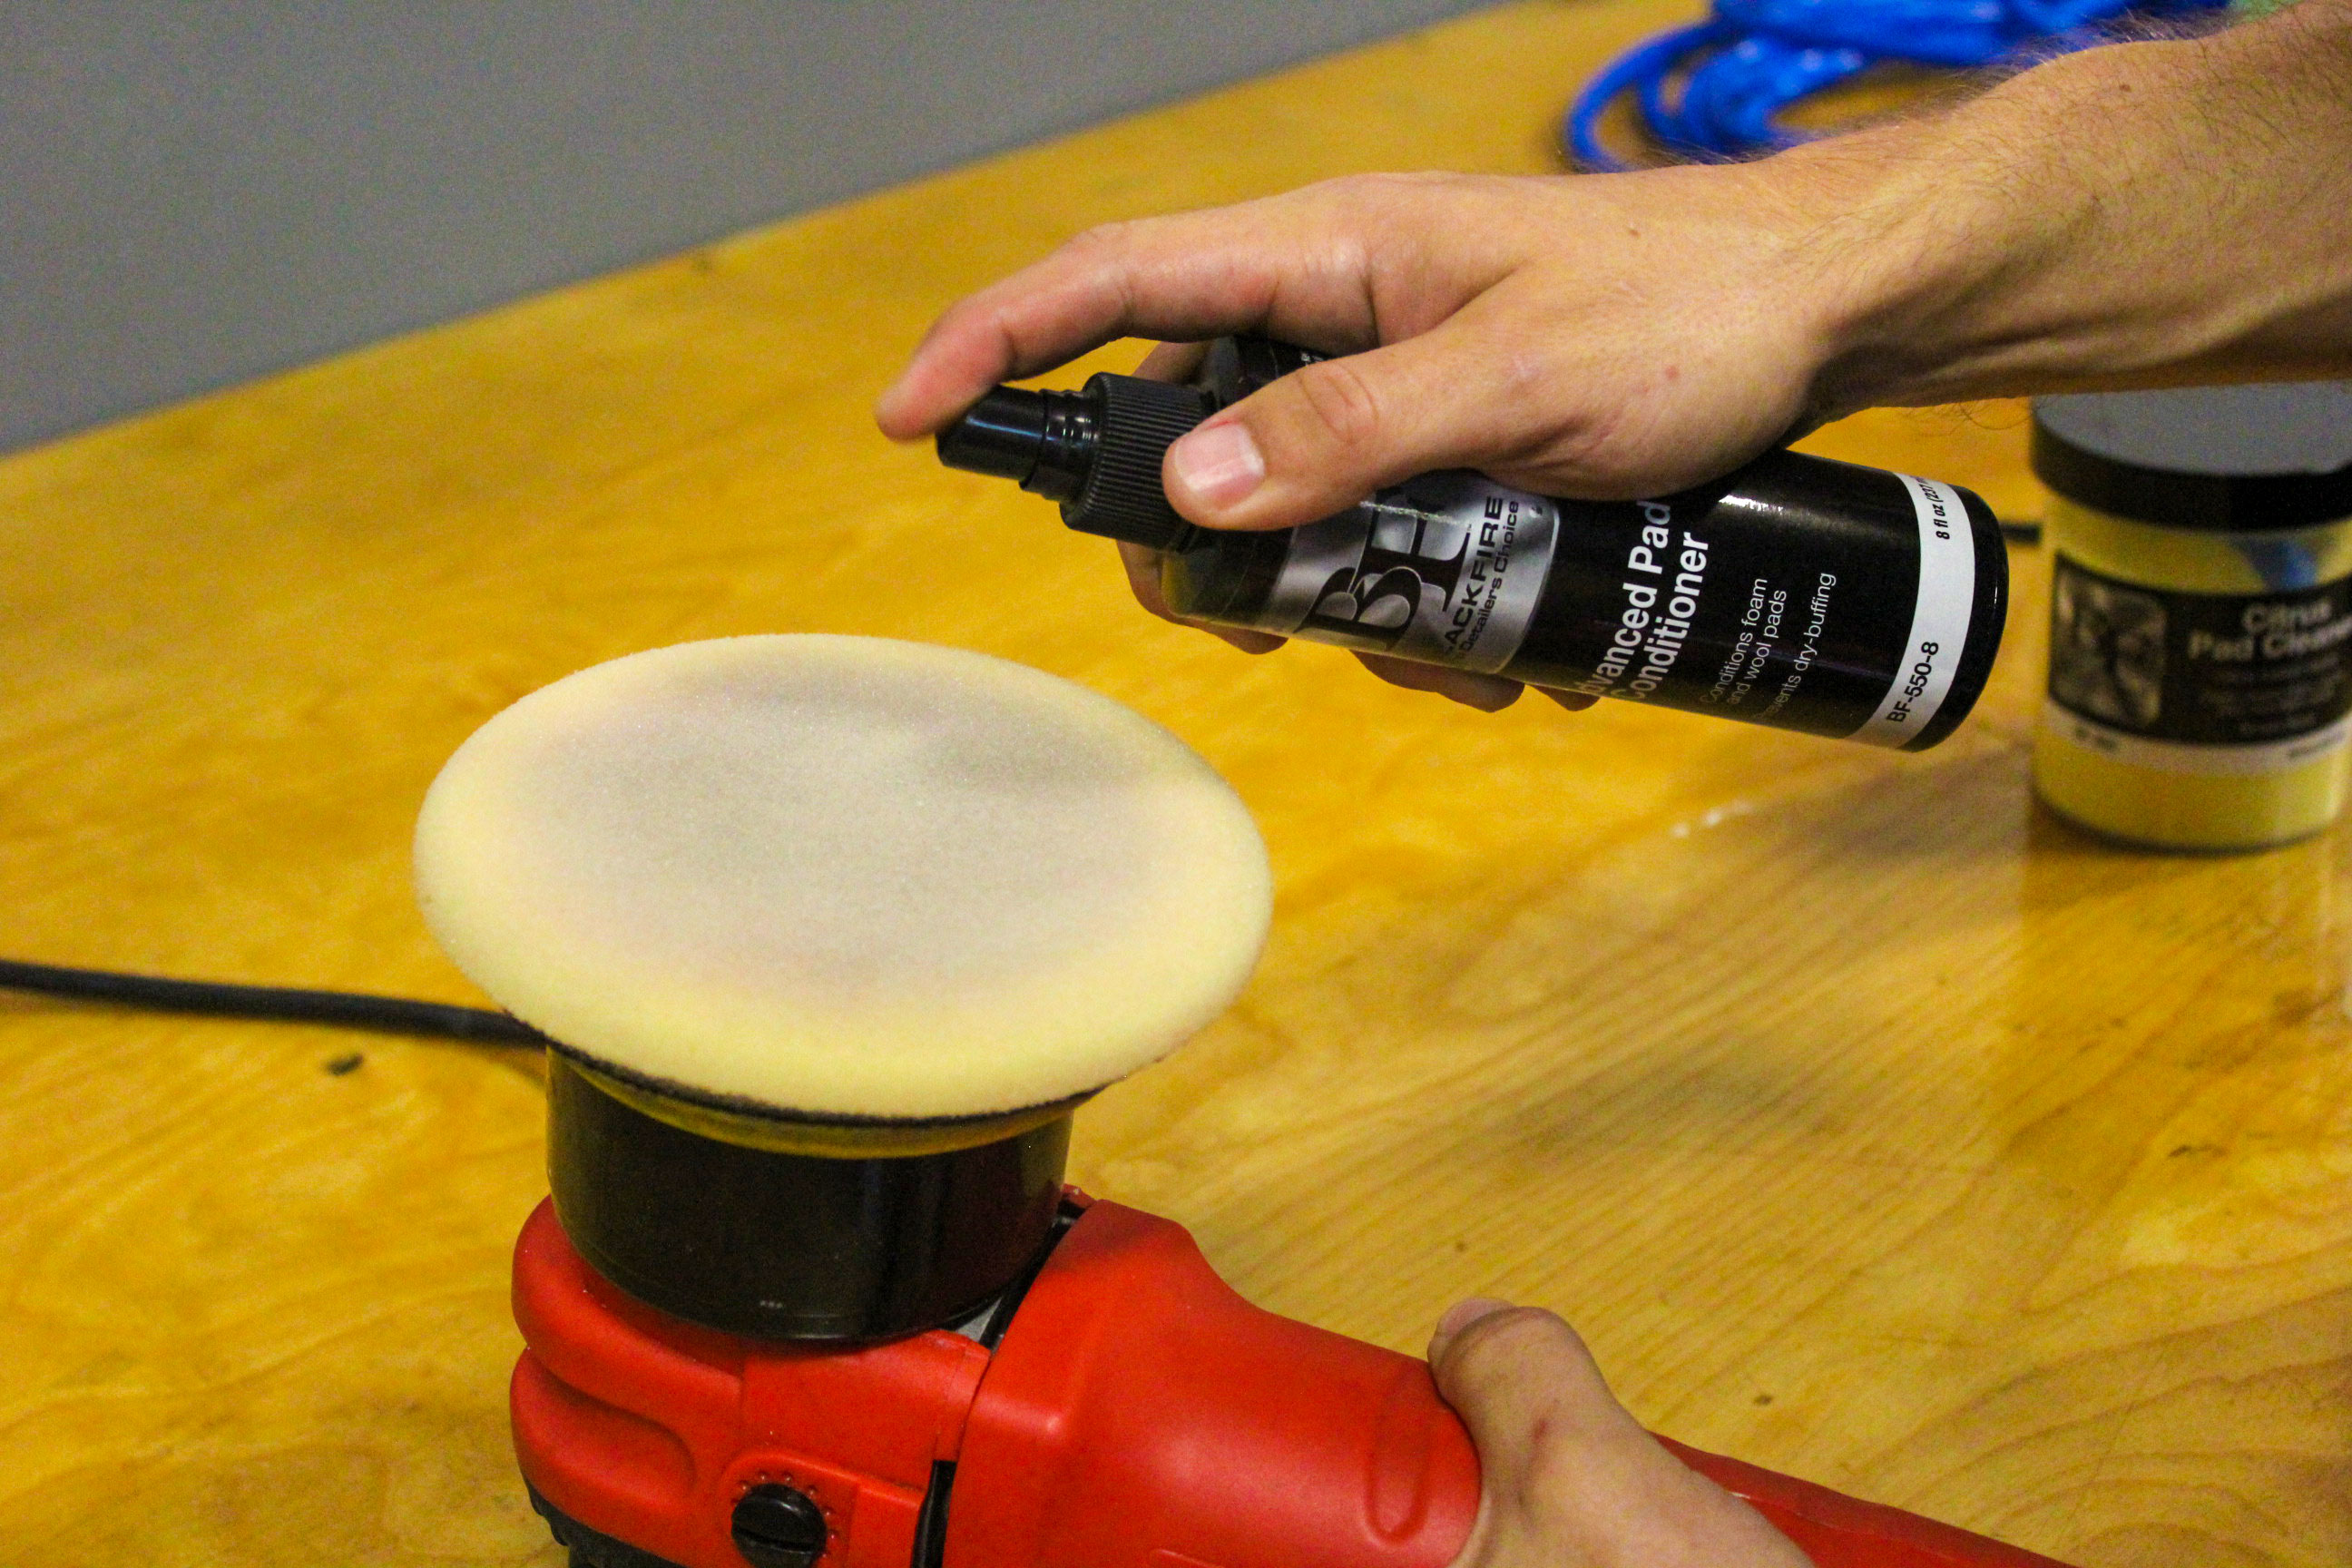
This will soften the cells of the foam pad to make sure that not too much friction is generated on the surface. This will not only ensure that we are not dry buffing the surface, but will also reduce pad wear and allow us to get more uses out of our pads.
For the second part of the priming process, we will apply some of our BLACKFIRE Polish to the pad and work it into the pad with our finger to make sure there is an even distribution of product across the surface.
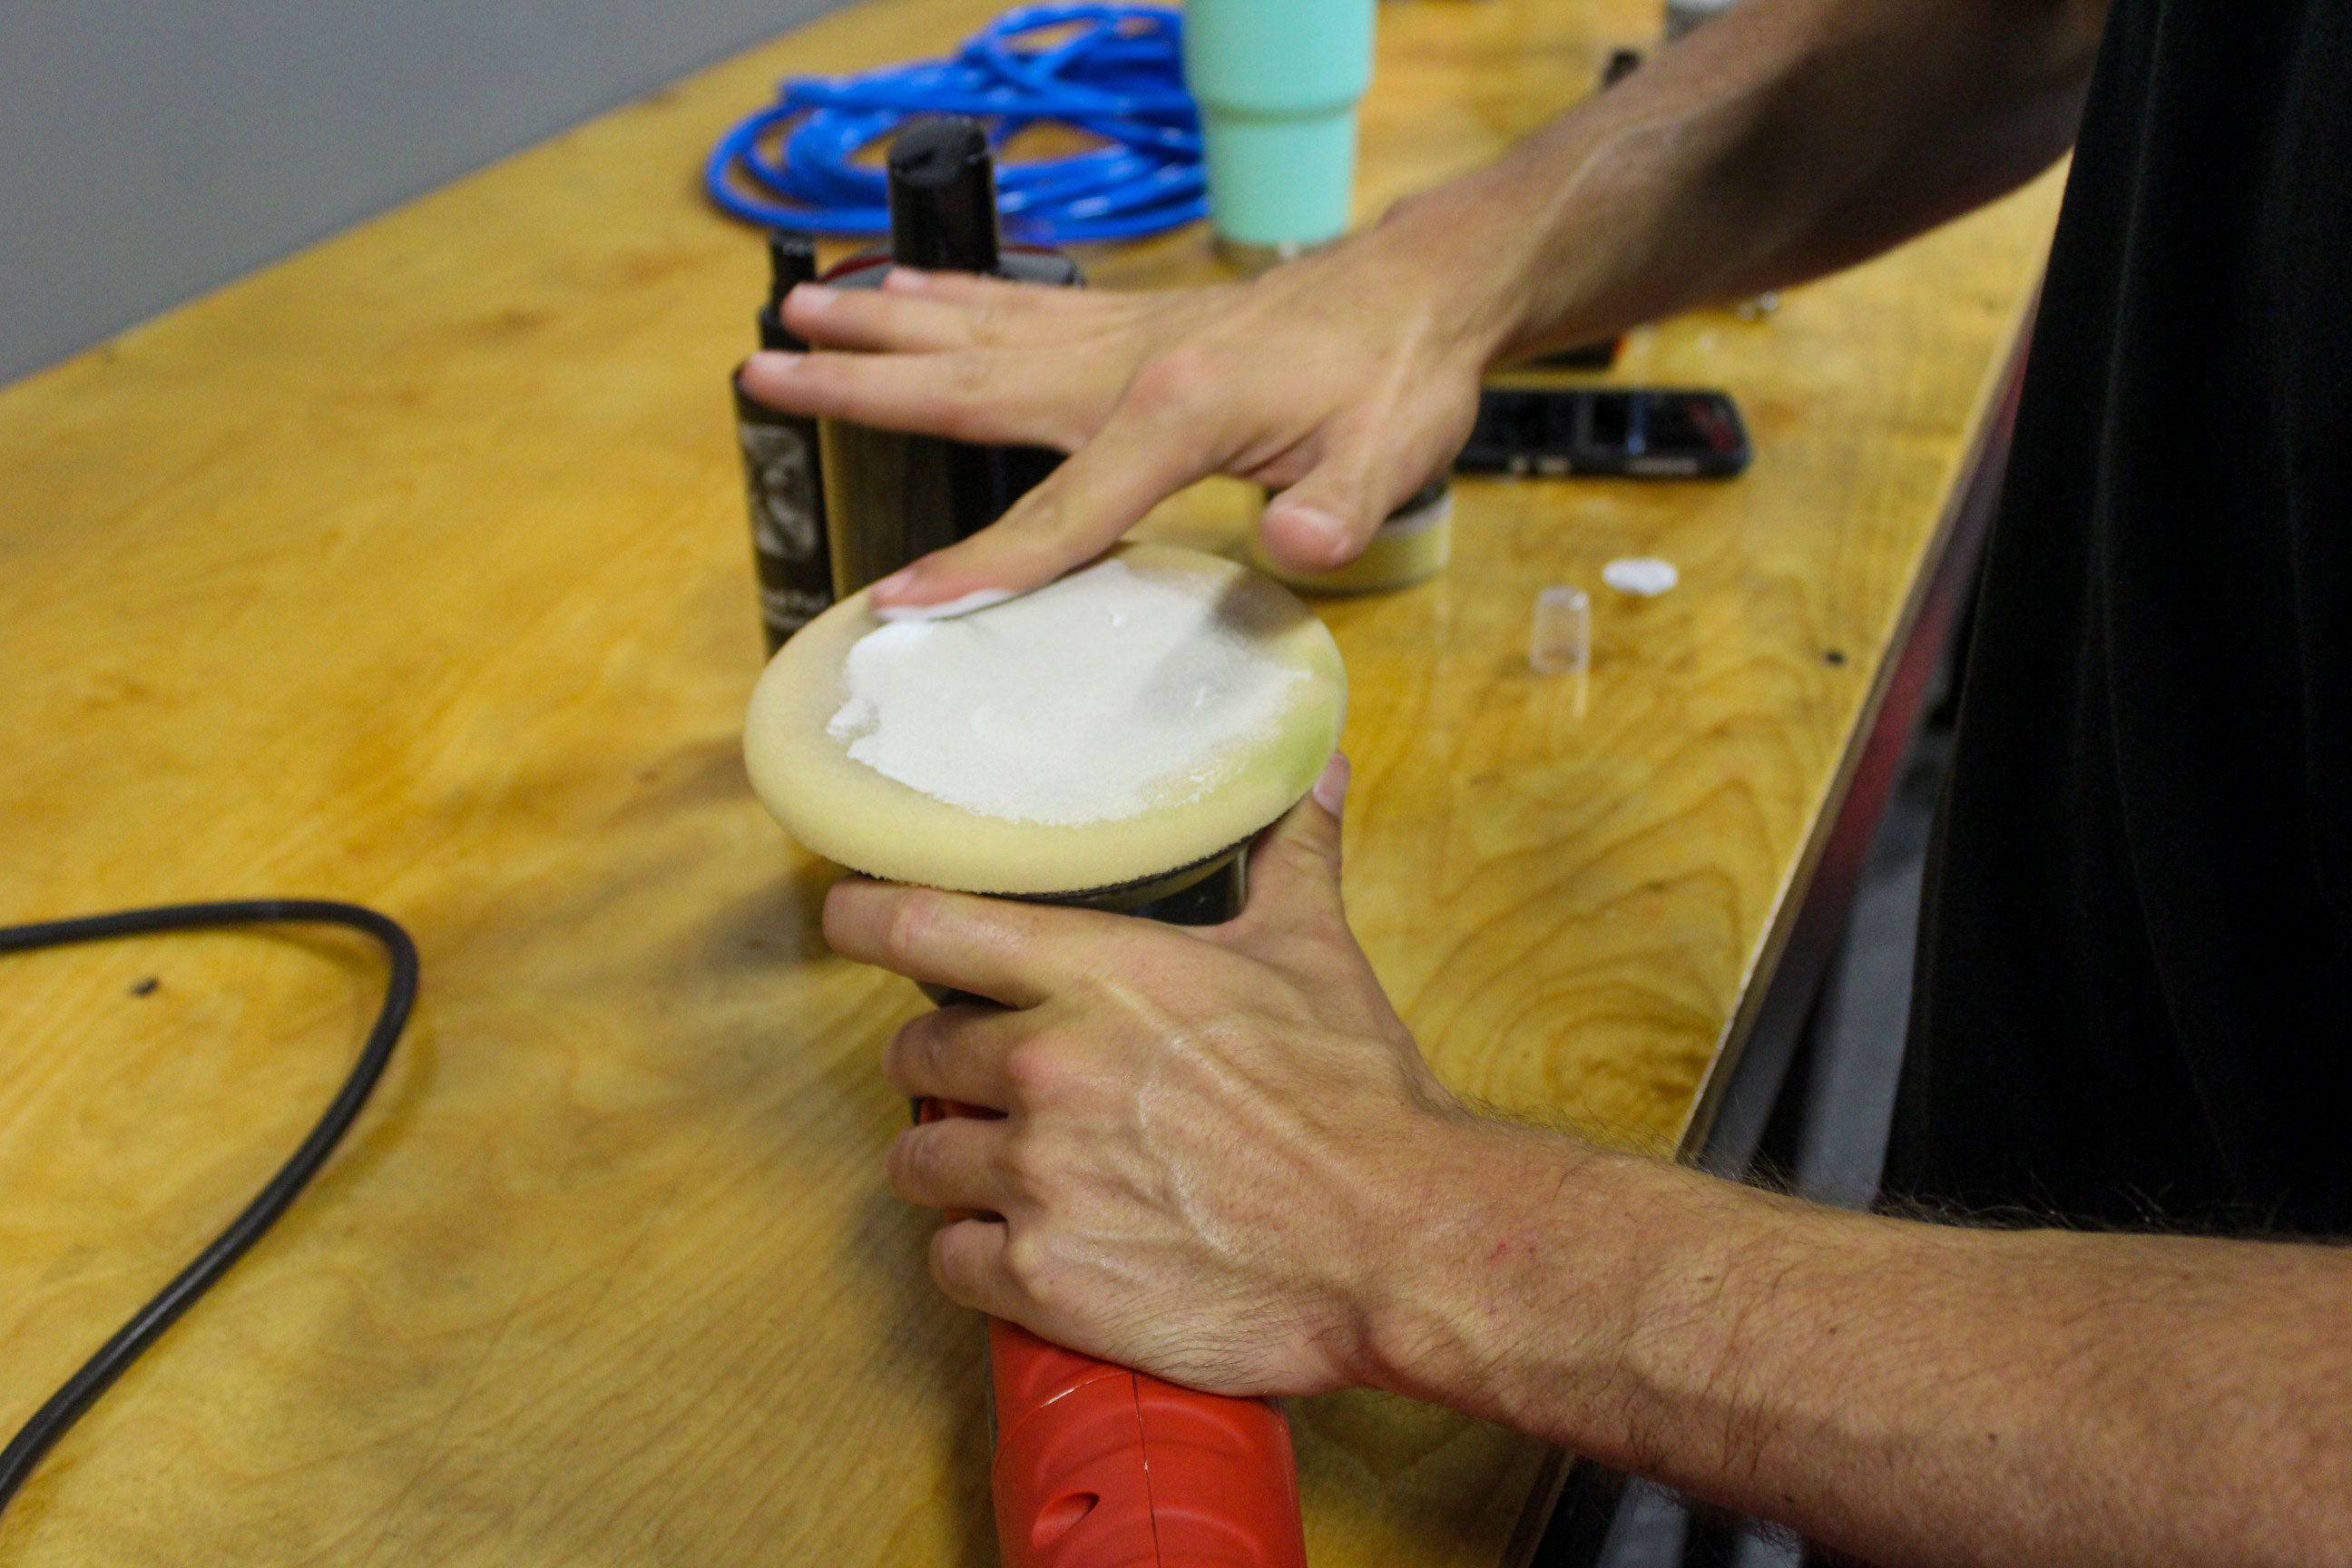
By doing so, we are making sure we reduce the risk of dry buffing AND increasing the consistency of our results.
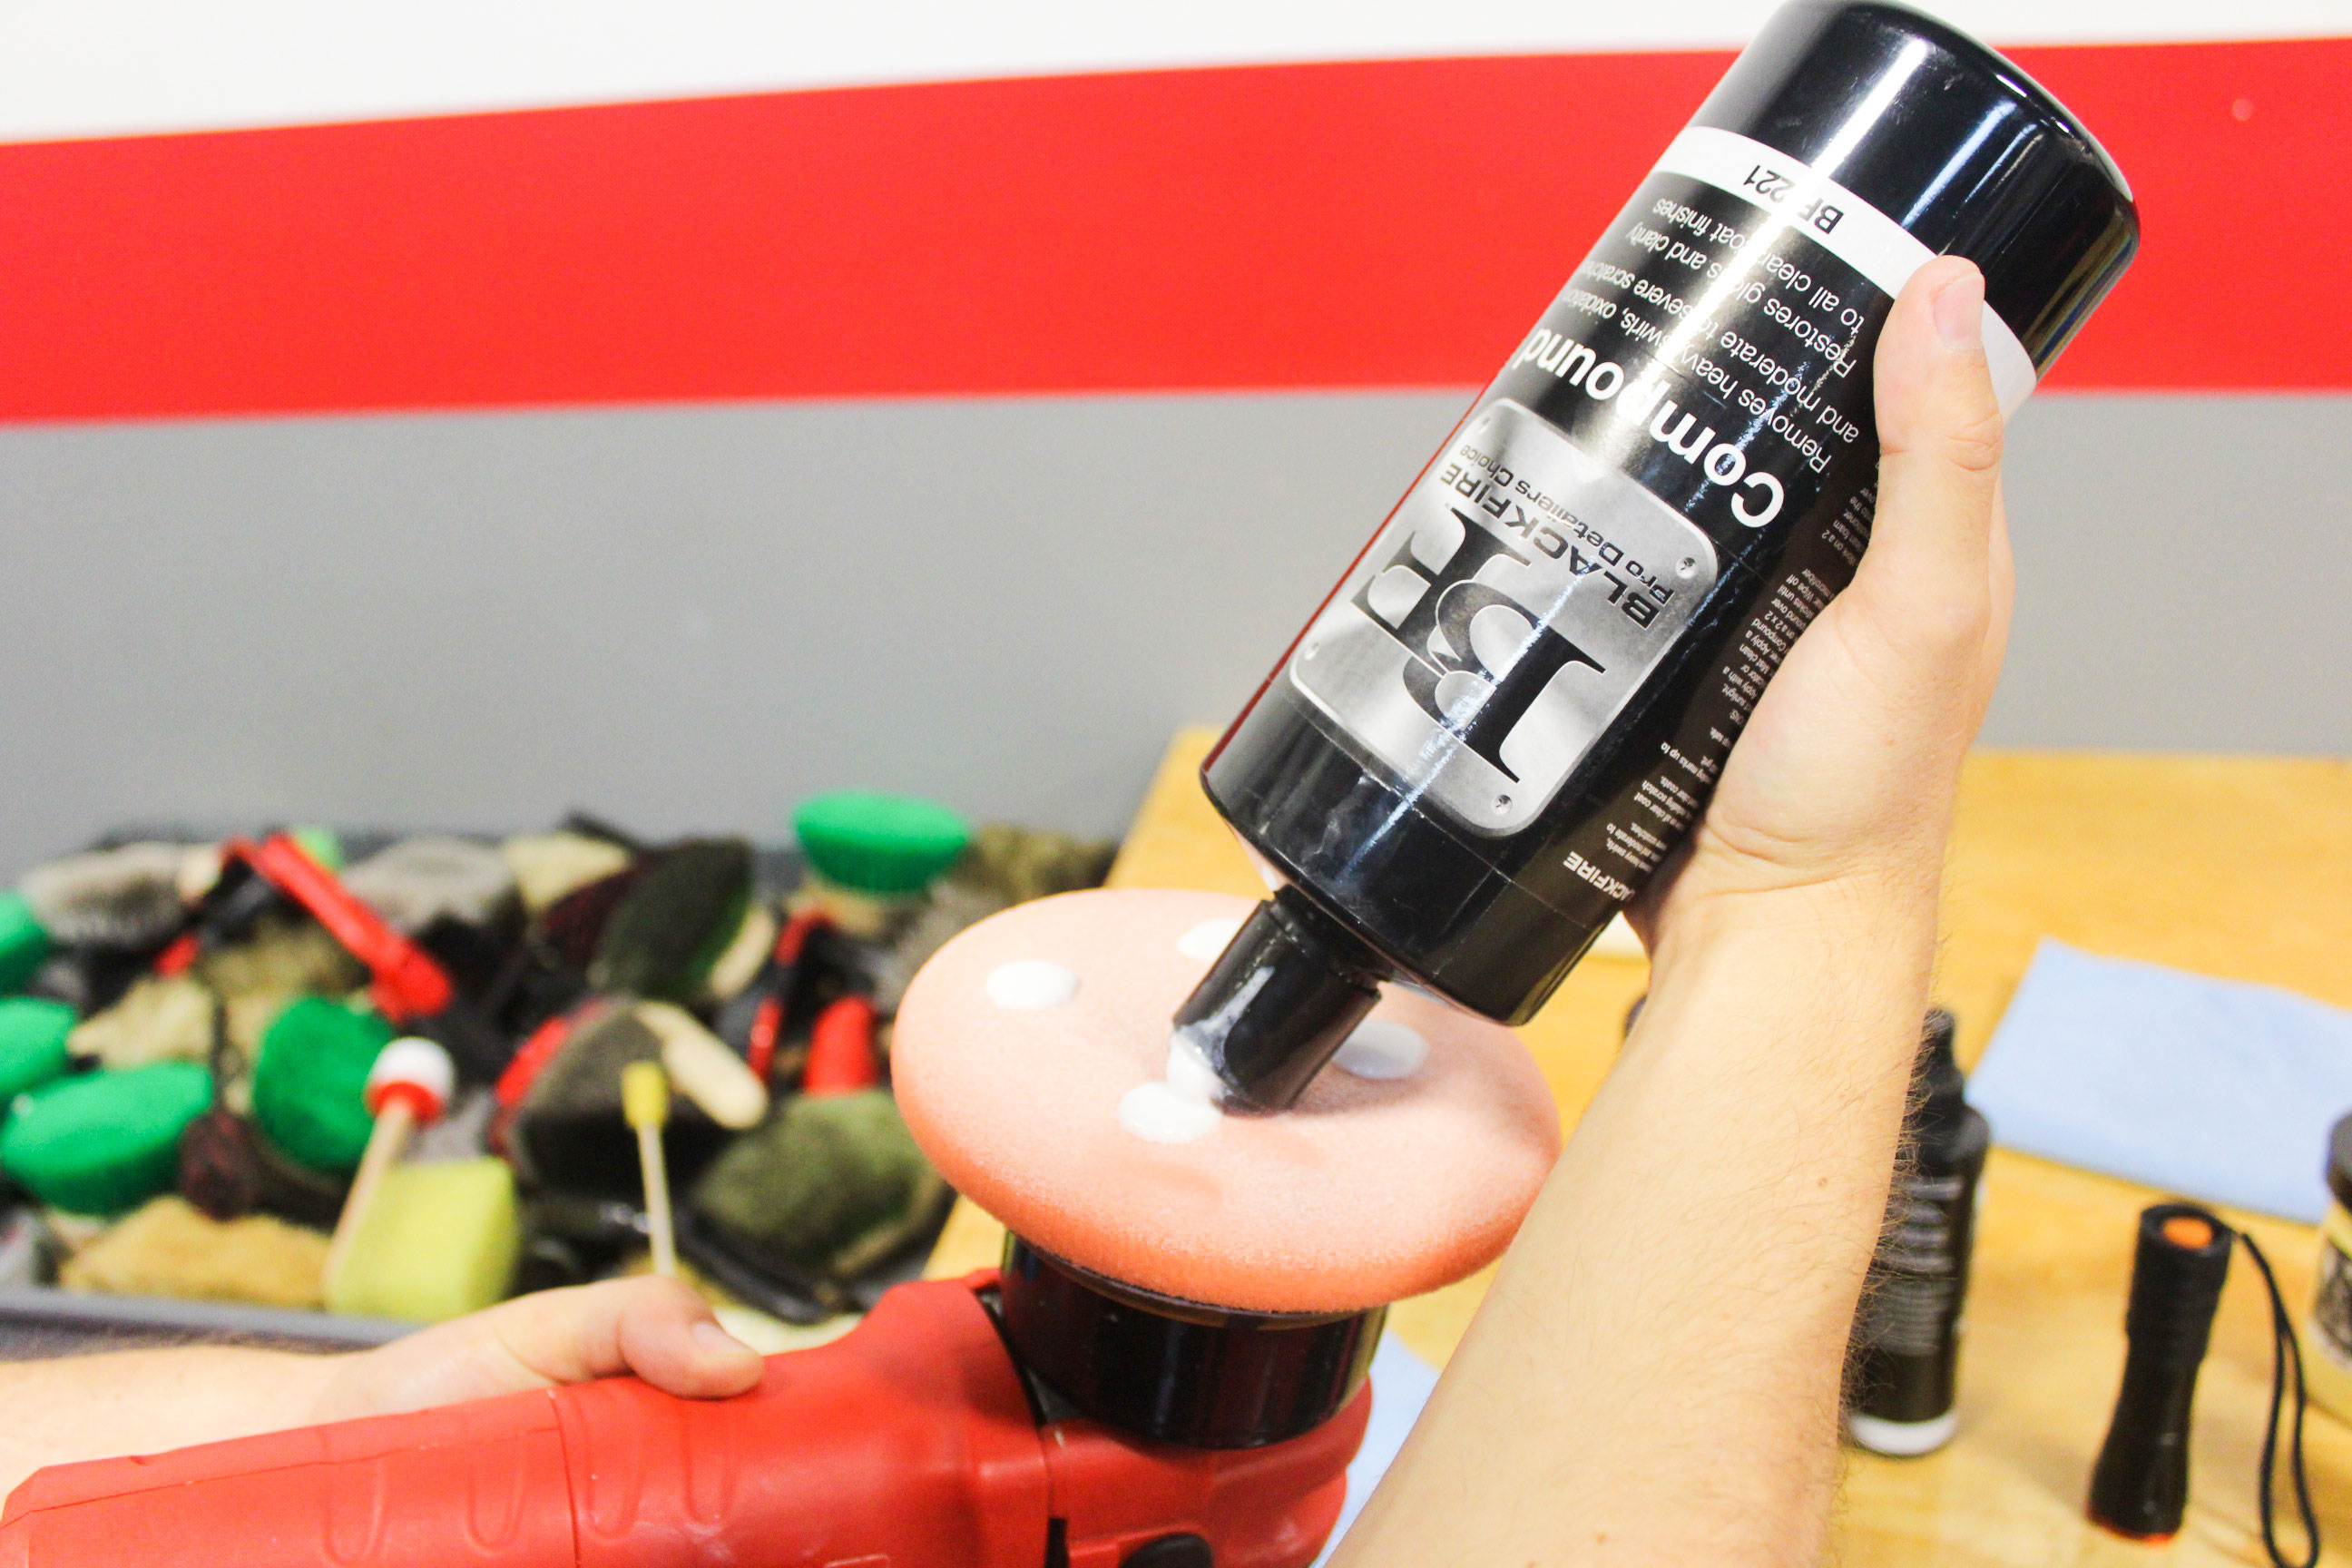
Now unto the polishing itself! We will apply 3 dime sized drops of our BLACKFIRE Polish on the pad surface. This will be enough product to correct the 2� x 2� section that we are using as our test section.
We are going to set our polisher to a speed setting of 3. This is just to spread the product across the area that we are working on. Once we have spread the product out, we will bump it up to 4 to actually work it in.
We will do 6 section passes, making sure to change the direction between each one. So first we will go left to right, then up and down, and switch between those until we have done our 6 section passes.
We will then buff of the remain residue and inspect the surface to see if we received the results we want.

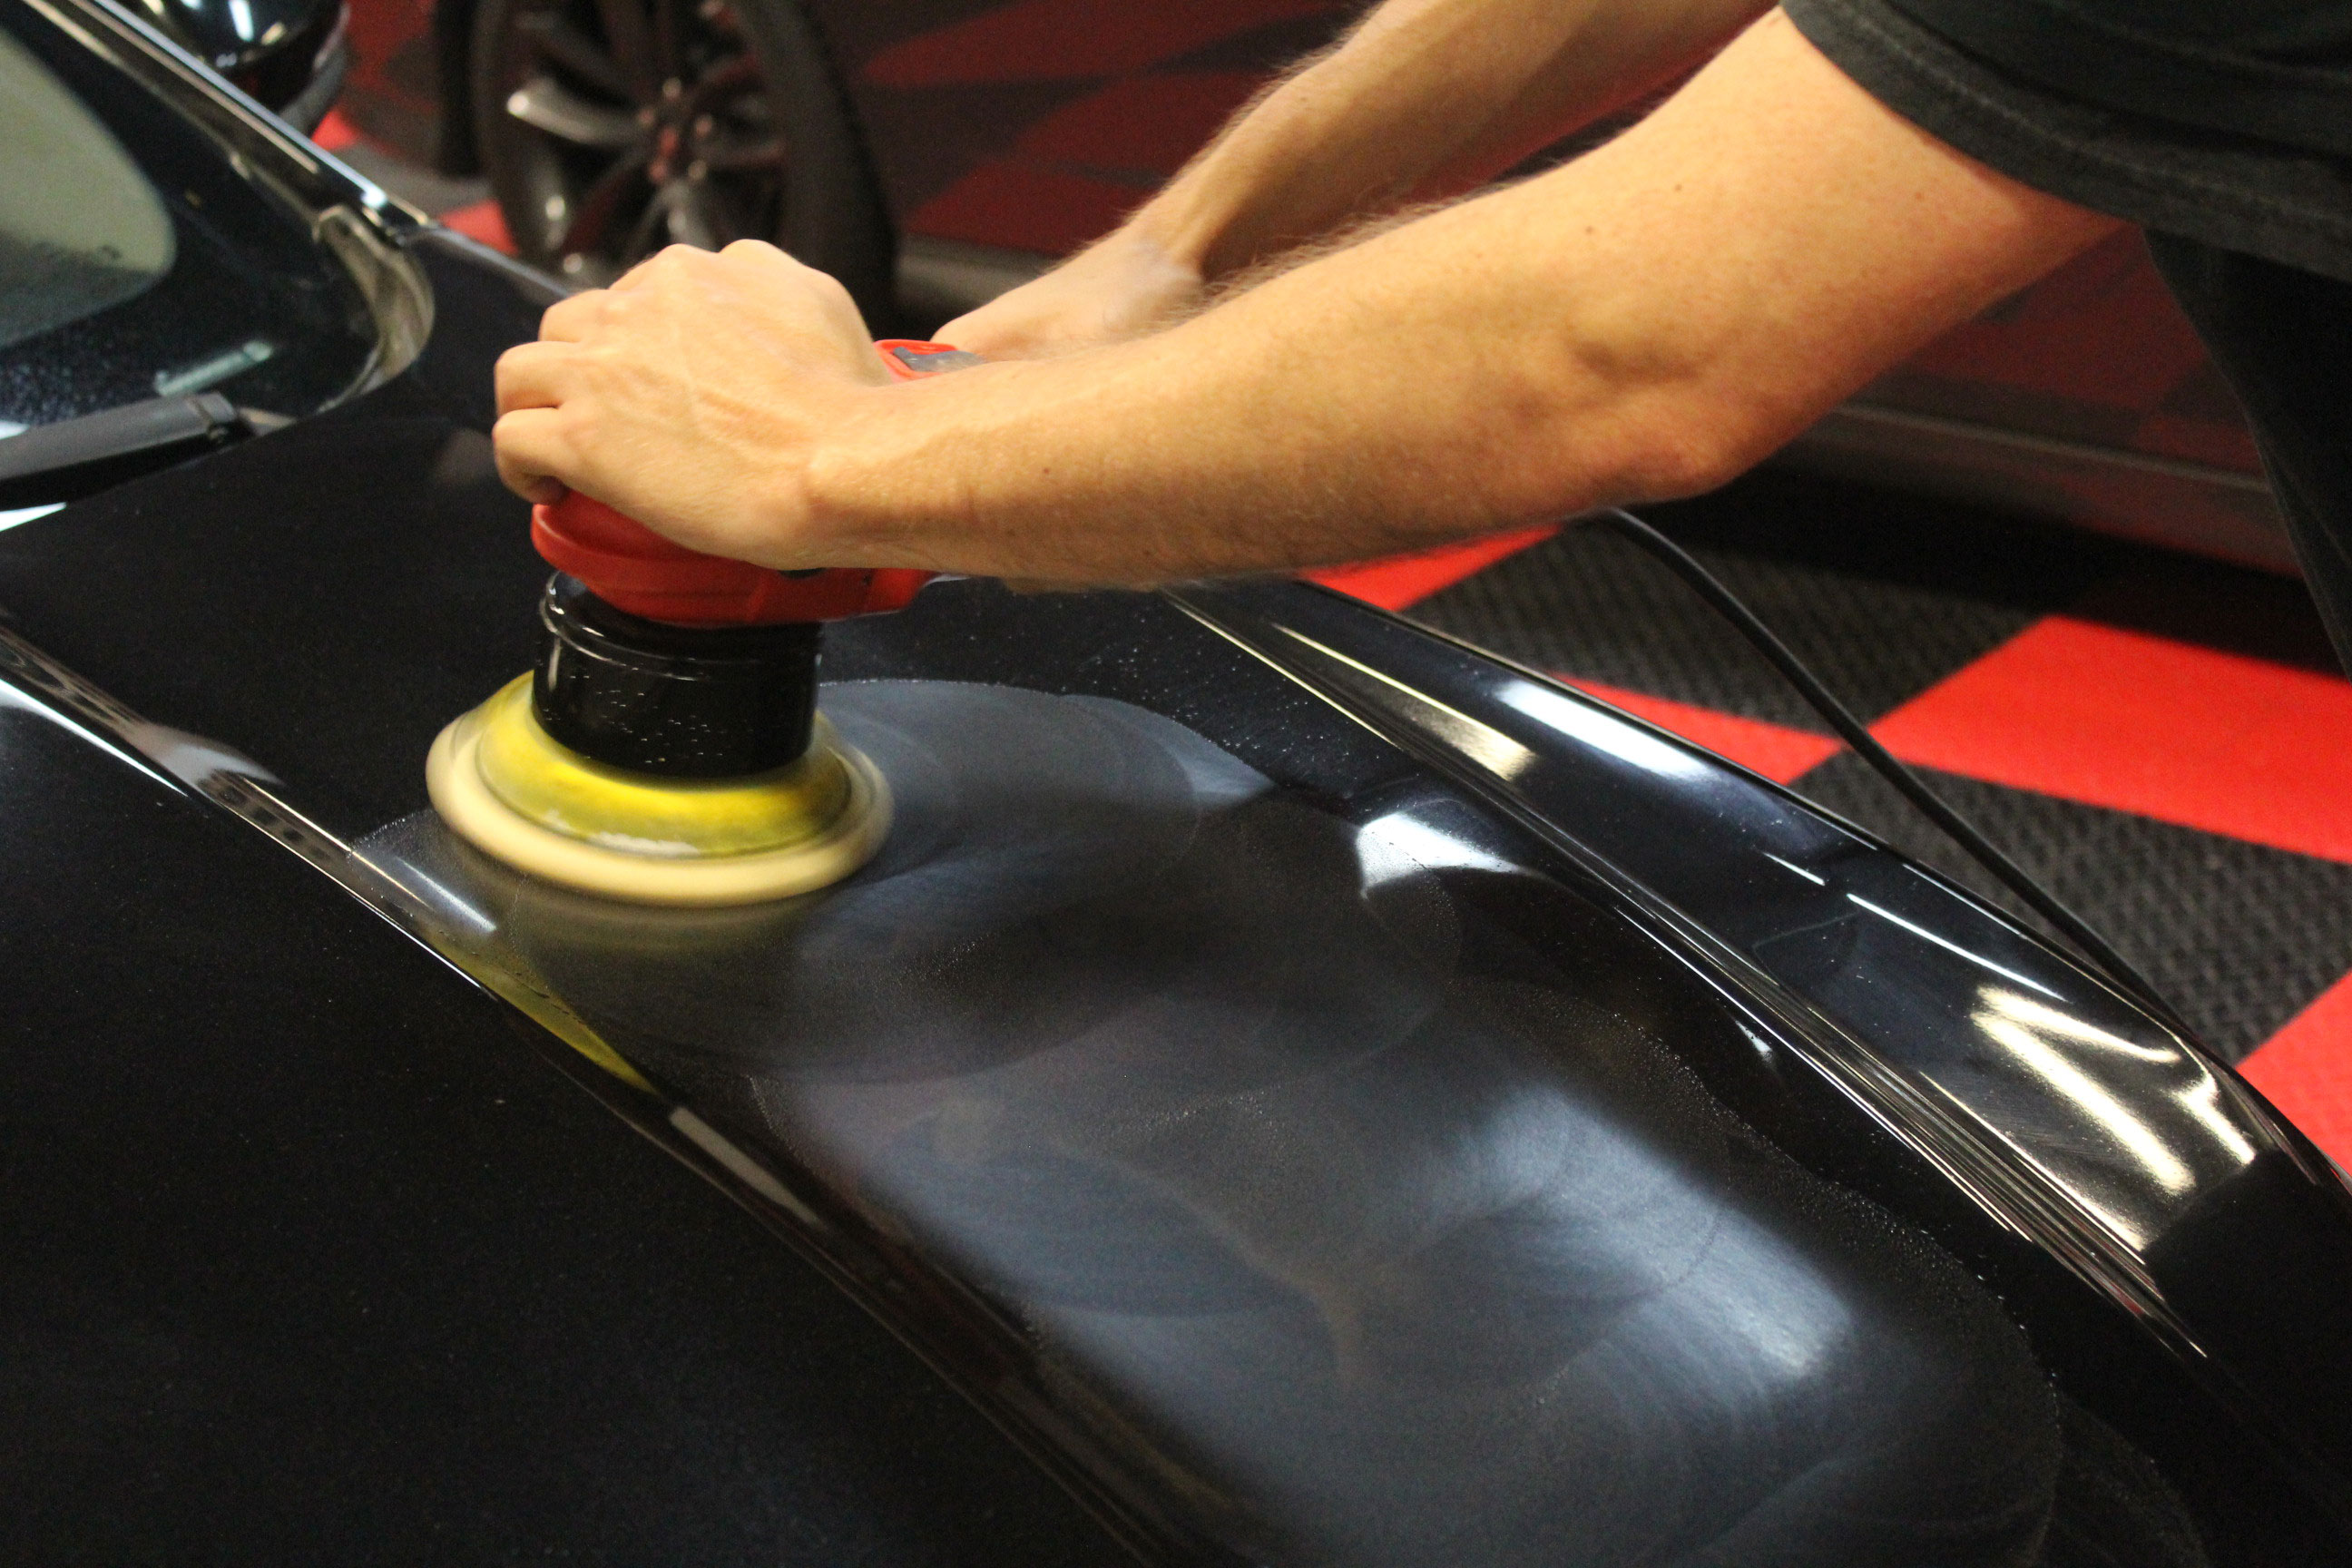
After inspecting the results, we were sure that it would take a bit more bite in order to get the paint to where we wanted it to be. As such, we decided to kick it up to using our BLACKFIRE Compound and a Lake Country ThinPro Orange Heavy Cutting Pad.
We have prepped this pad using the same process as we did with the polishing pad.
We are using a bit more product on the section this time around to make sure that we are able to take out the heavier defects that we saw in the paint.
We are going to repeat the same buffing process as we did with the polishing step, with a few small changes. We will still spread the product out by setting the polisher to a speed of 3. However, we are then going to kick the polisher up to a speed of 6 for the actual working process. This is because a compound has a higher grit. Higher grit means more friction, which means it will take more power to get the appropriate level of correction potential. So, speed 6 it is!
We are also going to up the number of section passes that we will do. After seeing the results (or rather lack thereof) during the polishing step, we know we will need to work the product on the paint more to get the results we want.
Once again, we will work in a cross-hatch pattern. Left to right. Up and down. Left to right. Etc�
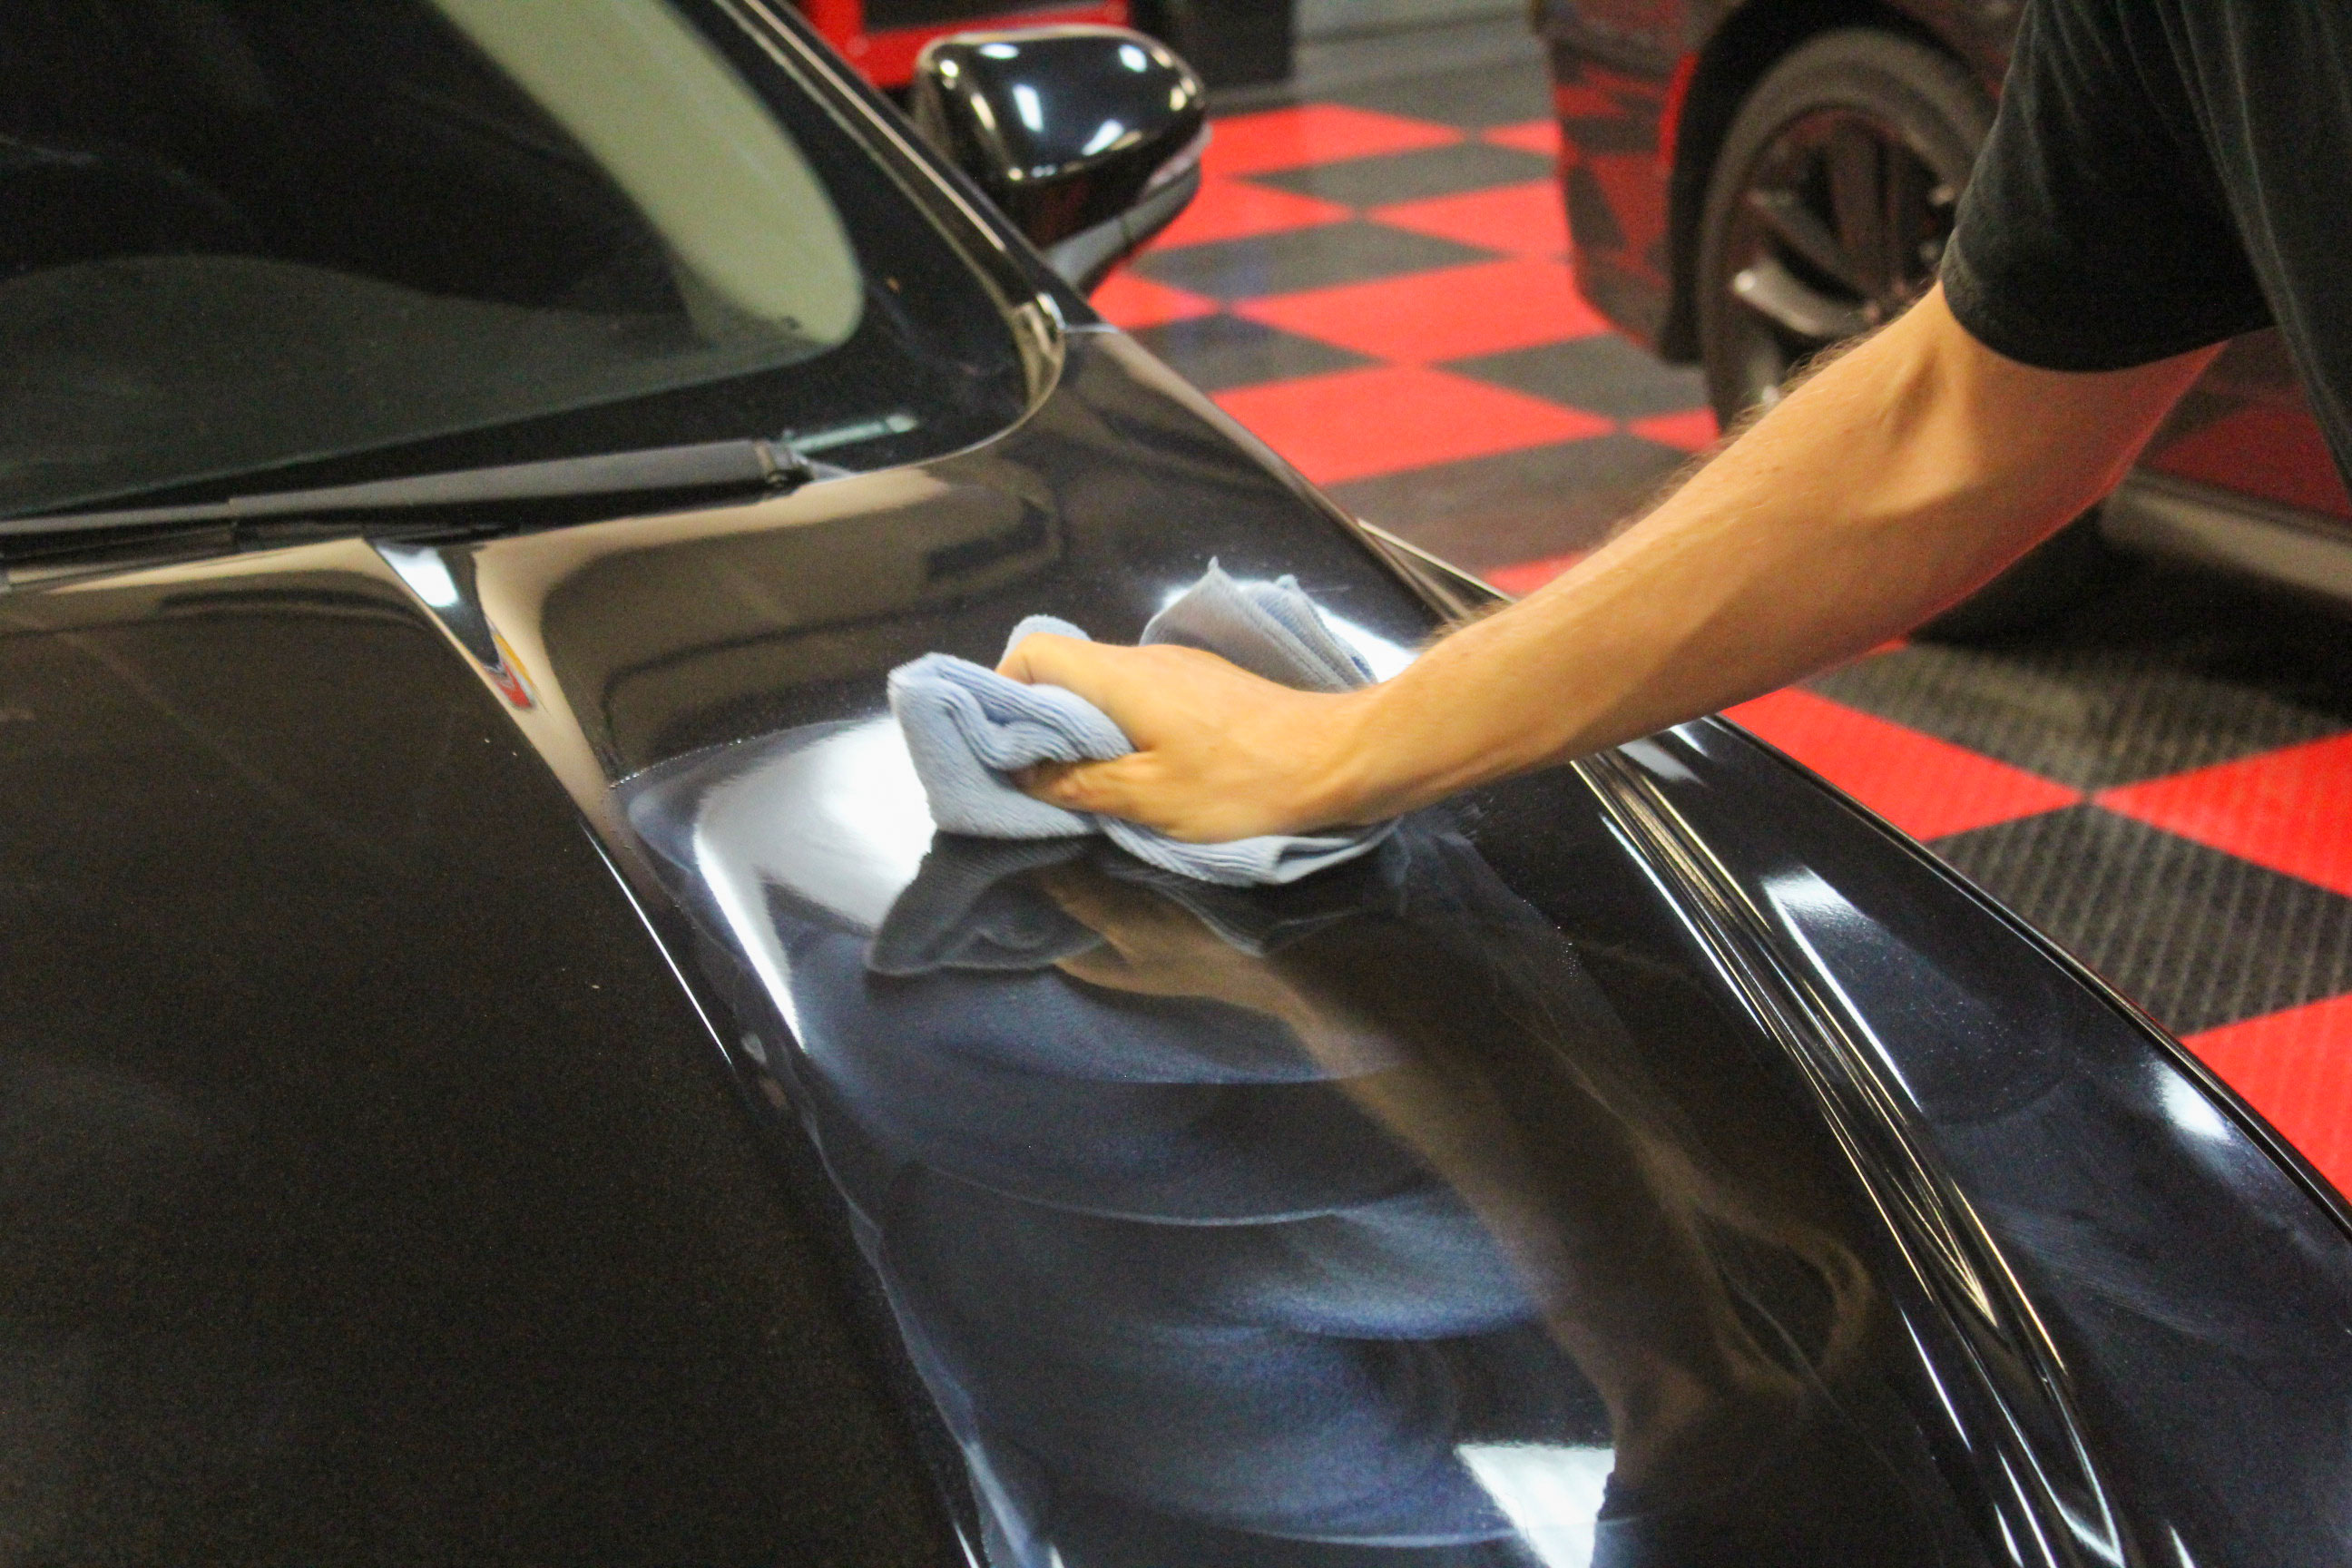
Once again, we buff of the product and inspect.
It looks like the defects we wanted to remove are gone! Now we just have to clean up the marring that was caused by the compounding step by polishing again. Then we should be good to go!
Step 3: The Repetition
The only thing to do now is just repeat that process over and over until the whole vehicle looks as amazing as that one section of the hood!
And that will take a while�
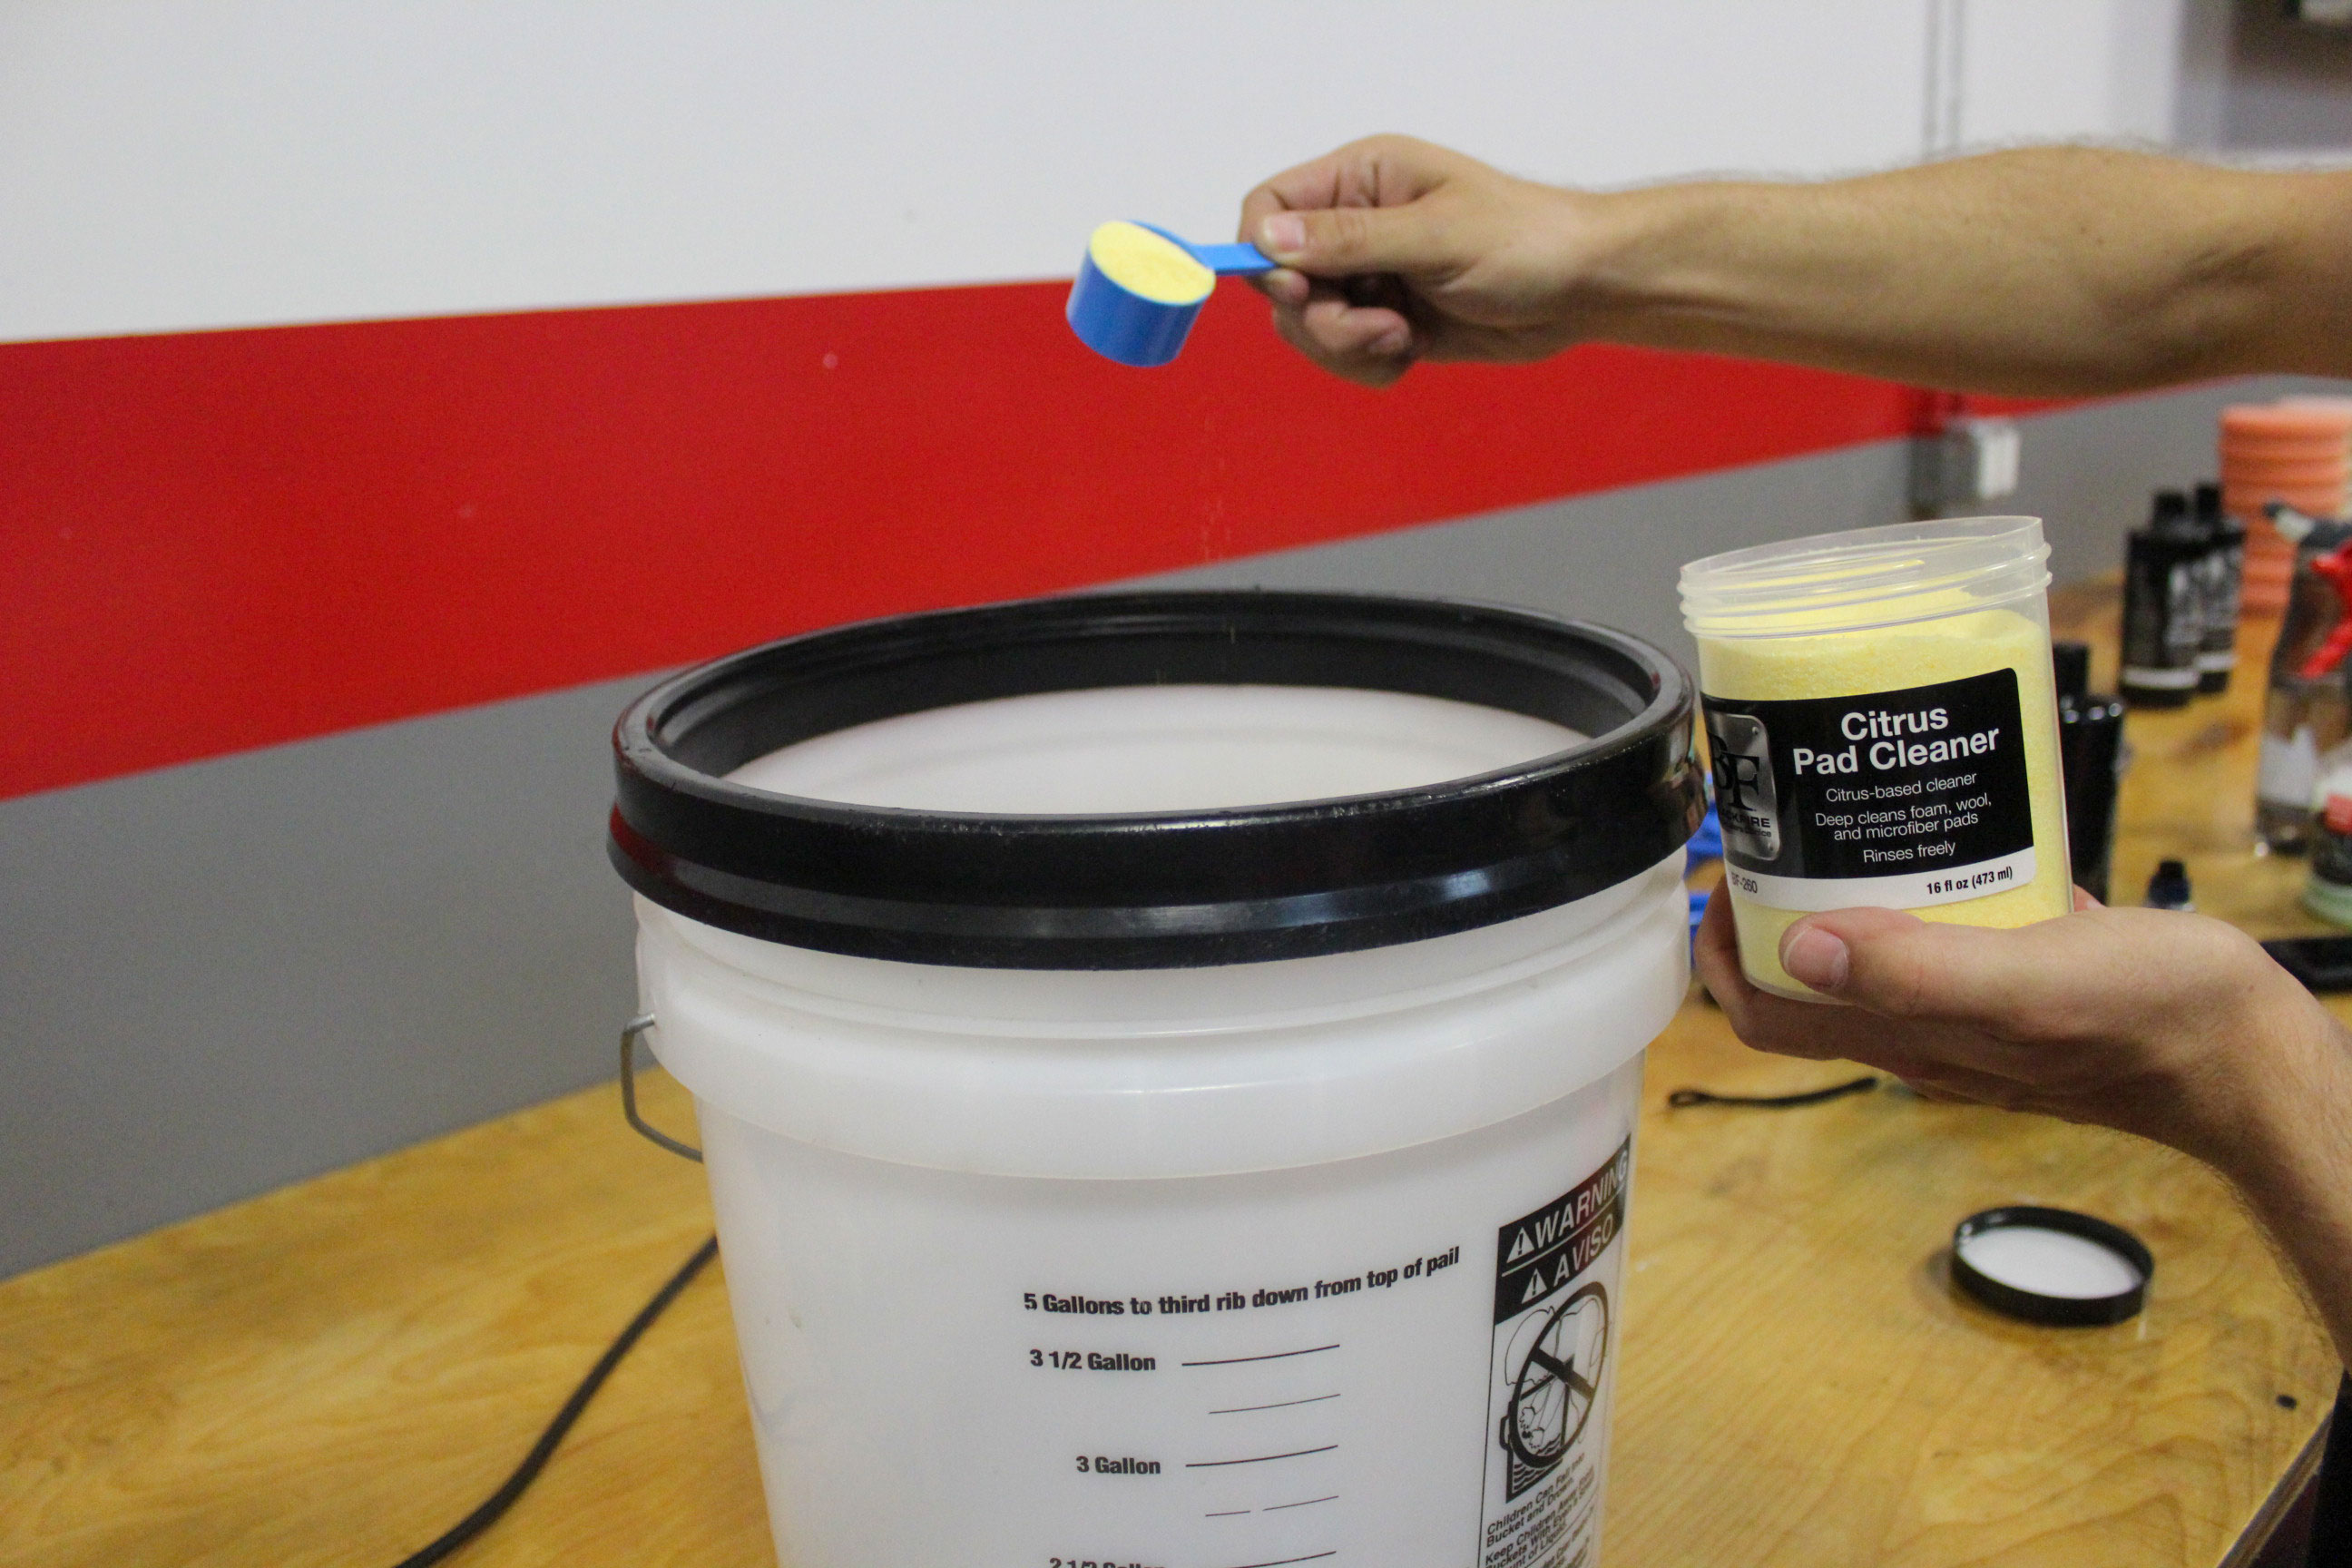
To make sure we are able to get the same consistent level of correction as we work our way around the car, we will need to swap to a clean pad often. As the pads soak up more and more product, they become saturated and soggy. This mean that they are no longer able to provide the same level of cut as before. So, after every panel (hood counts as two panels), we are going to switch out for a new pad, prime it, and move on.
To make our pad cleaning easier at the end of the job, we are going to draw our used pads a bath. And by that, we mean we are going to leave them to soak in a 5-gallon bucket that we filled with water and 2 ounces of BLACKFIRE Citrus Pad Cleaner.
For the smaller, more niche panels, we switched over to the 3 in. Griot�s Garage Polisher and 3 in. pads.
Step 4: The Admiration
There were a few spots that we just weren�t able to touch. Some scratches and went all the way to the primer, a spot of what probably used to be bird dropping that was left to bake, and some bug remains that were pitted to hell. However, the car looks like a dream compared to the beginning!

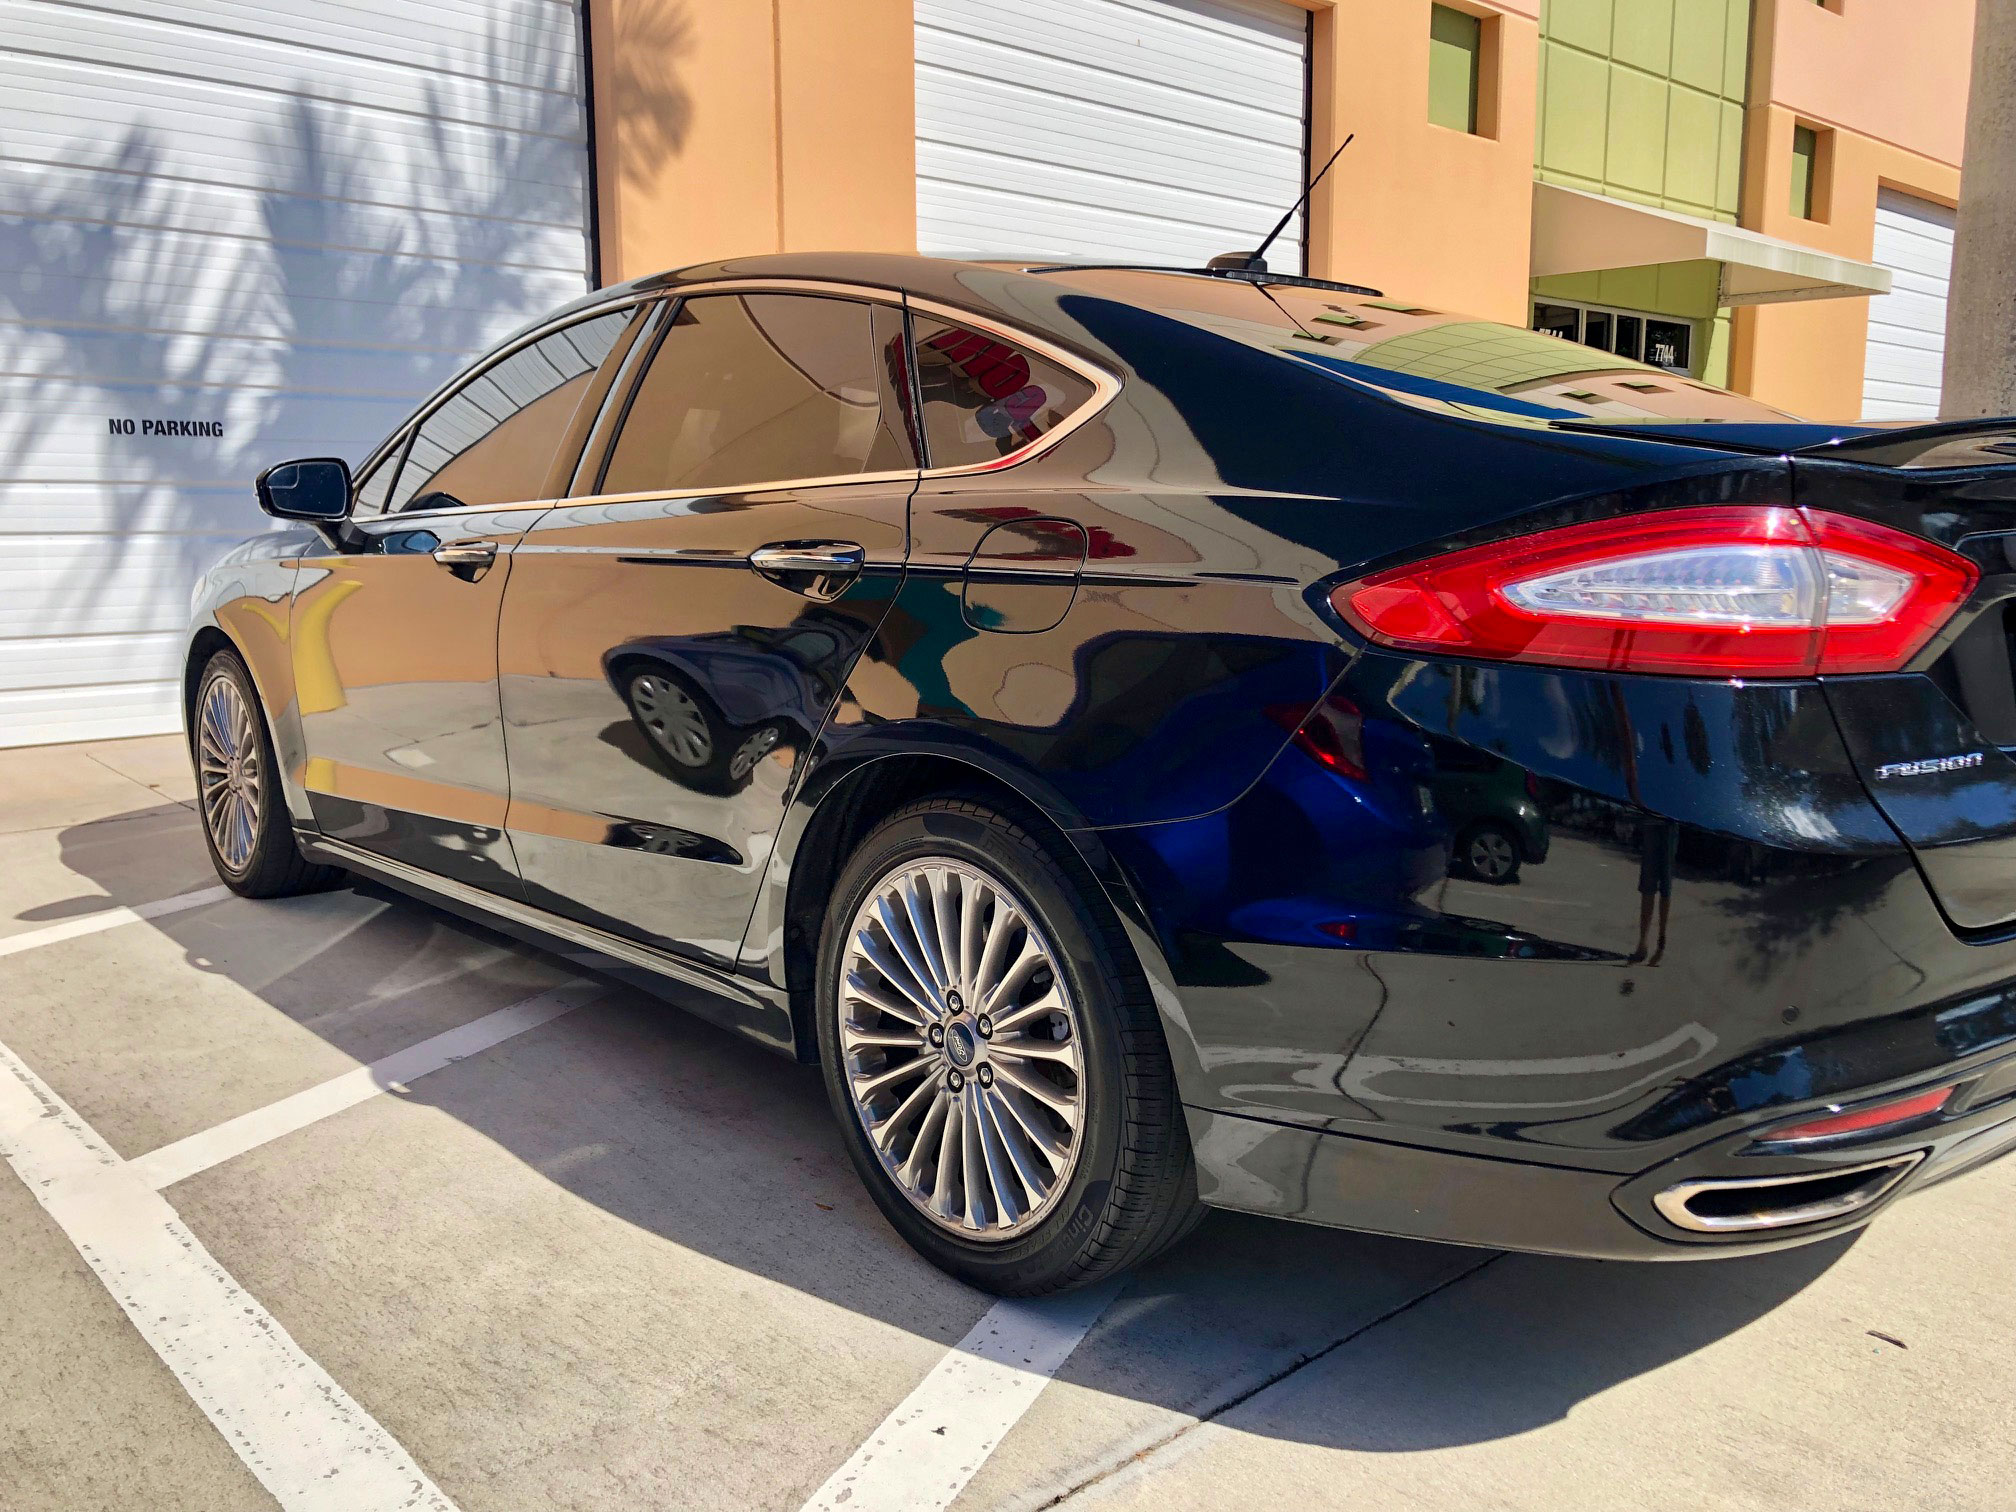
It took a while and tired us out, but now this car�s paint is back to its prime!
$169.99
$49.99